
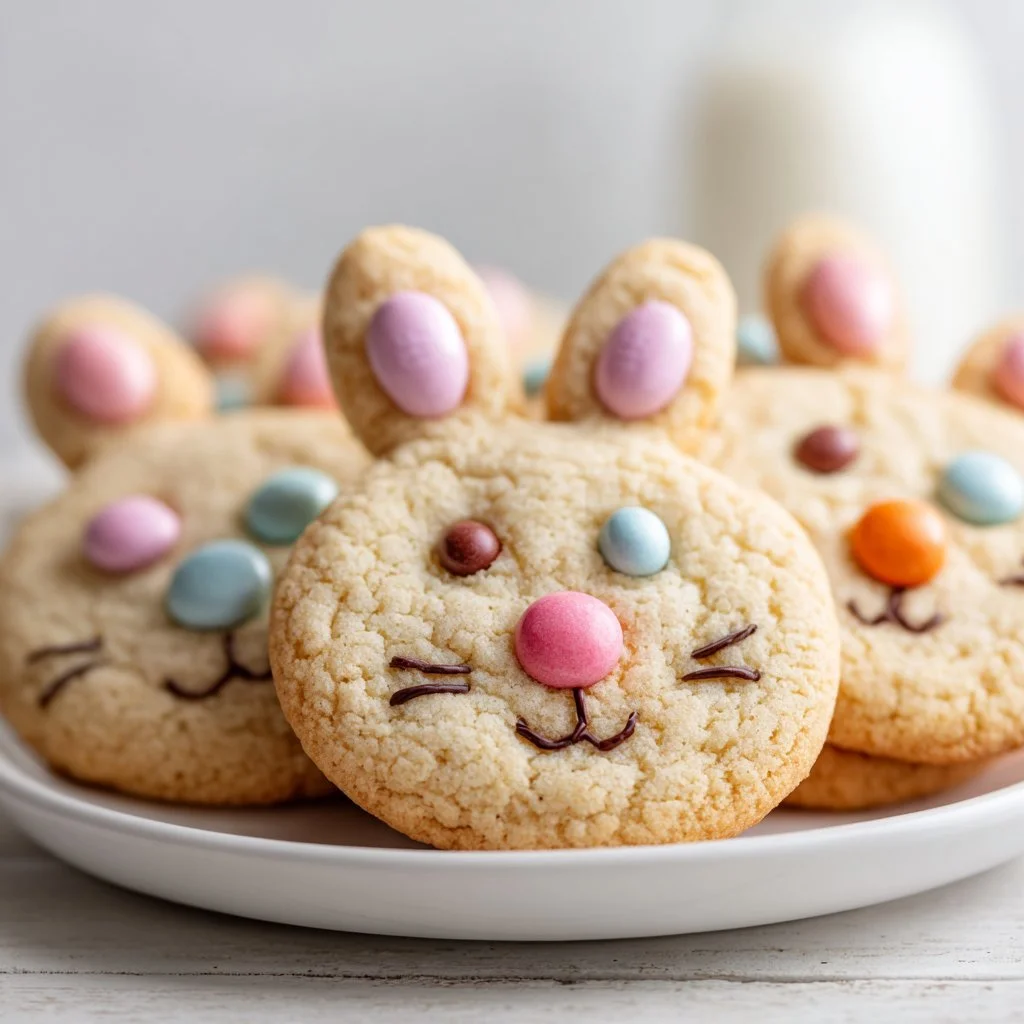
A little spring magic on a baking sheet goes a long way. These Easter Bunny M&M Cookies are cute, fast, and perfect for parties or school treats.
They bake up soft in the center with a slightly crisp edge and an irresistible candy-chew pop from the M&Ms. Try them with a cold glass of milk and watch them disappear.
If you like playful cookies that are easy to decorate, this is the recipe to pin and repeat. I also often pair them with seasonal cookie bars for variety, like this chocolate-peep stuffed idea for Easter baking inspiration: chocolate peep-stuffed Easter cookies.
Why You’ll Love This Easter Bunny M&M Cookies
- Adorable spring-themed presentation that’s simple to assemble.
- Soft, slightly chewy cookie base that holds up to decoration.
- Minimal decorating skill required — kids can help.
- Ready in under 30 minutes from start to finish.
- Uses pantry staples with one festive bag of pastel M&Ms.
- Great for classroom parties, bake sales, or gifts.
- Easily doubled or frozen for make-ahead treats.
The flavor is classic butter-and-vanilla cookie with a sweet candy crunch from the M&Ms. The texture balances a tender center with edges that just set, creating a mouthfeel that’s soft yet not underbaked.
"Five stars — my kids named these the best Easter cookies ever. They were soft, pretty, and vanished at the party!" — a happy reader
Key Ingredients for Easter Bunny M&M Cookies
Butter (1 cup, softened)
Butter is the flavor backbone; it provides richness, tenderness, and helps cookies spread correctly. Use unsalted butter for better control of seasoning; if substituting salted, reduce the added salt slightly. Margarine will change flavor and spread, and it may make the texture less tender.
All-Purpose Flour (2 ¾ cups)
Flour gives structure; all-purpose balances protein content so cookies are neither cakey nor too dense. Measure by spooning into the cup and leveling or weighing for consistency. Substituting a higher-protein bread flour will yield chewier cookies; cake flour makes them softer and more fragile.
White Granulated Sugar (1 ½ cup)
Sugar controls sweetness, browning, and crispness at the edges. Granulated sugar promotes spread and tiny crisp edges; if you swap part of it for brown sugar you’ll get a moister, more caramelized cookie. Using all brown sugar results in deeper flavor but less spread.
Pastel M&Ms (1 bag, for faces and ears)
The M&Ms give color, texture, and the defining bunny look when halved for ears. Use full bags of pastel candies or any seasonal M&Ms; smaller candy shells reduce cracking. If you substitute with chocolate chips, the ears won’t work the same, but you’ll still have tasty cookies.
Full Ingredient List for Easter Bunny M&M Cookies
- 1 cup butter, softened
- 1 ½ cup white granulated sugar
- 1 large egg
- 1 teaspoon pure vanilla extract
- 2 ¾ cups all-purpose flour
- 1 teaspoon baking powder
- ½ teaspoon baking soda
- ½ teaspoon salt
- 1 bag pastel M&M’s (for faces and ears)
Step-by-Step Instructions for Easter Bunny M&M Cookies
Step 1: Prepare the M&M ears
Slice half of the pastel M&Ms vertically with a sharp knife to make two thin ear halves from each candy. Work on a cutting board and keep the halves face-up so the colorful shell stays intact.
Pro Tip: The ear halves should look like small, clean crescents with intact color — not smashed.
Step 2: Preheat and prep the pan
Preheat your oven to 350℉ and line a baking sheet with parchment paper or a silicone baking mat for even browning and easy cleanup. Arrange sheets so air can circulate and don’t crowd the pan.
Pro Tip: The oven should smell neutral and feel evenly warm; parchment or a silicone mat should lie flat with no bubbles.
Step 3: Cream butter and sugar
In the bowl of an electric mixer, cream together the softened butter and granulated sugar until the mixture is light, pale, and fluffy. This takes about 2–4 minutes on medium speed and incorporates air that helps the cookies rise gently.
Pro Tip: The creamed mixture should look paler and fluffier than when you started; it will feel slightly airy to the touch.
Step 4: Add egg and vanilla
Add the large egg and pure vanilla extract to the creamed butter and sugar. Mix on medium until the egg is fully incorporated and the batter looks smooth and glossy.
Pro Tip: The dough should be cohesive and slightly glossy — no streaks of raw egg should be visible.
Step 5: Whisk dry ingredients
In a separate bowl, whisk together the all-purpose flour, baking powder, baking soda, and salt to ensure even distribution of leavening and seasoning. This prevents pockets of baking soda or uneven rise.
Pro Tip: The dry mix should be uniform in color with no lumps.
Step 6: Combine wet and dry
Slowly pour the dry ingredients into the mixer on low speed until the dough just comes together. Don’t overmix; stop as soon as no loose flour remains and the dough is soft but holds its shape.
Pro Tip: The dough should feel slightly tacky and hold together when pinched into a ball.
Step 7: Portion the dough
Scoop two tablespoons of dough at a time and roll into balls. Place the balls on the prepared baking sheet spaced about 2 inches apart. Flatten each slightly into a disk so they bake evenly and give space for the M&M face.
Pro Tip: The disks should be about ¾ inch thick and smooth on top with no cracks.
Step 8: Bake the cookies
Bake for 9–11 minutes or until the edges are just set but the tops still look soft. Rotate the sheet halfway if your oven has hot spots. Avoid baking until the tops look fully browned.
Pro Tip: The edges should be lightly golden while the centers remain pale and soft.
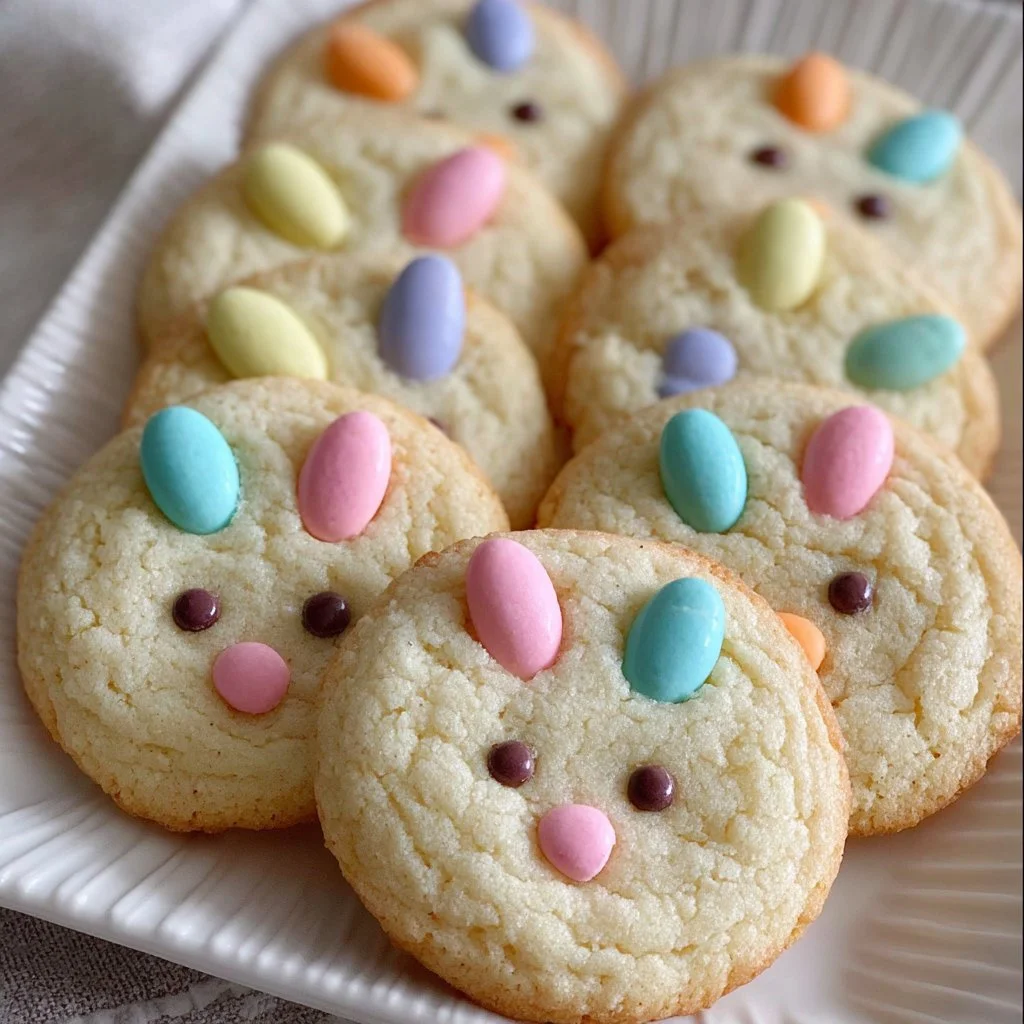
Step 9: Add M&M faces and ears
Let the cookies cool on the pan for exactly 1–2 minutes. Gently press one whole M&M into the center of each cookie for the face, then press two M&M halves above it to form ears. Allow the cookies to finish cooling on a rack.
Pro Tip: The candy should sit flush but not sink; if the cookie is too hot the candy may crack or melt.
Pro Tip: If you want inspiration for similar seasonal cookies and different decorating ideas, see this Cadbury egg cookie variation: Cadbury egg cookies recipe.
Expert Tips for Easter Bunny M&M Cookies
- Temperature tips: Ensure butter is softened to room temperature, not melted. Properly softened butter creams with sugar to trap air; if too warm, cookies will over-spread.
- Oven calibration: Use an oven thermometer; many home ovens run 10–25℉ off, which affects bake time and chew.
- Texture troubleshooting: If cookies are cakey, you likely used too much flour or overmixed. Weigh your flour or spoon-and-level to avoid excess.
- If cookies spread too thin, chill the dough 15–30 minutes before baking or reduce oven temp by 10℉ for more controlled spread.
- Equipment tip: Use a disher or two-tablespoon scoop for uniform cookies; consistent size yields consistent bake times.
- Common mistakes: Pressing candies in when cookies are too hot causes cracking. Also, slicing M&Ms too thick makes ears heavy and they will flop.
- Visual cue tip: For soft centers, remove cookies when they still look slightly underbaked in the middle; they’ll firm as they cool.
- Decorating tip: For perfect ears, slice candies with a ceramic or very sharp knife and press halves gently with a fingertip rather than forcing them.
For another playful Easter cookie technique and bar-style ideas, you might enjoy these chewy malted cookie bars for variation: chewy Easter malted cookie bars.
Storage & Freezing for Easter Bunny M&M Cookies
Fridge storage: Store cooled cookies in an airtight container in the refrigerator for up to 1 week. Place a sheet of parchment between layers to prevent sticking.
Freezer storage: Freeze cookies flat on a sheet pan until firm, about 1 hour, then transfer to a freezer-safe container or heavy-duty zip-top bag for up to 3 months. Separate layers with parchment to avoid crushing the M&M ears.
Thawing: Thaw frozen cookies at room temperature for 20–30 minutes. If the M&Ms feel soft after thawing, allow cookies to rest on the counter an extra 10 minutes to firm.
Reheating: Warm a cookie for 8–10 seconds in the microwave for a soft, just-baked feel, or 3–4 minutes in a 300℉ oven for a slightly crisp edge.
Best containers: Use rigid, shallow airtight containers for short storage and freezer-safe rigid boxes for long storage to protect decoration.
Variations & Substitutions for Easter Bunny M&M Cookies
Chocolate-swirl Easter Bunny M&M Cookies
Add ¼ cup dutch-processed cocoa to the dry ingredients and reduce flour by 2 tablespoons. The result is a richer, chocolatey cookie that contrasts nicely with pastel candies.
Brown-butter Easter Bunny M&M Cookies
Brown the butter before creaming for a nutty, toffee-like flavor. The cookies will have deeper caramel notes and slightly less spread because brown butter has less moisture.
Gluten-free Easter Bunny M&M Cookies
Replace all-purpose flour with a 1:1 gluten-free blend that contains xanthan gum. Expect a slightly different crumb but similar shape; chill dough briefly to maintain structure.
Mini M&M bite-size cookies
Portion dough with a 1-tablespoon scoop and bake 7–9 minutes for small treats. They’re perfect for lunchboxes and gift tins and have a higher candy-to-cookie ratio.
Frequently Asked Questions About Easter Bunny M&M Cookies
Q: Can I make the dough ahead of time?
A: Yes. You can refrigerate dough, tightly wrapped, for up to 48 hours. Chilled dough often bakes up thicker and more uniform. For longer storage, freeze dough balls on a sheet pan, then transfer to a bag for up to 3 months.
Q: Why did my cookies spread too much?
A: Over-softened or melted butter, too little flour, or a too-warm oven can cause excess spread. Chill the dough 15–30 minutes, check flour measure, and ensure butter is room temperature, not greasy.
Q: How do I keep the M&M ears from cracking?
A: Use a very sharp knife to halve the M&Ms and let the cookies cool 1–2 minutes before pressing the halves in. Press gently so the candy shell settles without cracking.
Q: Can I use other candies besides M&Ms for faces and ears?
A: Yes. Mini chocolate candies, mini chocolate chips, or small jelly candies work, but the ear shape relies on halving a small, thin candy. Test a few to see how they sit on warm cookies.
Q: How do I get a softer center without underbaking?
A: Slightly underbake by removing when edges are set but centers appear a touch glossy. Let cookies rest on the pan; carryover heat finishes them while keeping a tender center.

Final Thoughts on Easter Bunny M&M Cookies
These cookies are an easy, festive baking project that looks impressive with minimal effort. They’re forgiving, family-friendly, and great for last-minute holiday trays.
Conclusion
For a step-by-step video version with similar techniques and a visual guide, see Easter M&M Cookies (+ Video) – Gluesticks Blog which shows slicing tips and placement ideas.
If you want an alternate Easter cookie that leans into chocolate chips, check this recipe for inspiration: Easy Easter Chocolate Chip Cookies – Practically Homemade.
For another seasonal M&M cookie take and comparison to this recipe, explore Spring M&M Cookies – Kroll’s Korner for flavor and decoration variations.
Please leave a star rating in the recipe card below and pin this recipe to Pinterest if you loved these bunnies.
Easter Bunny M&M Cookies
Ingredients
Method
- Slice half of the pastel M&Ms vertically to make ear halves.
- Preheat your oven to 350℉ and line a baking sheet with parchment paper.
- In an electric mixer, cream together butter and sugar until light and fluffy.
- Add the egg and vanilla, mixing until smooth.
- In a separate bowl, whisk together flour, baking powder, baking soda, and salt.
- Slowly combine wet and dry ingredients, mixing until just combined.
- Scoop and roll the dough into balls, place on a baking sheet spaced 2 inches apart.
- Flatten each ball slightly and bake for 9–11 minutes until edges are set.
- Remove from the oven and let cookies cool for 1–2 minutes before decorating with M&Ms.