
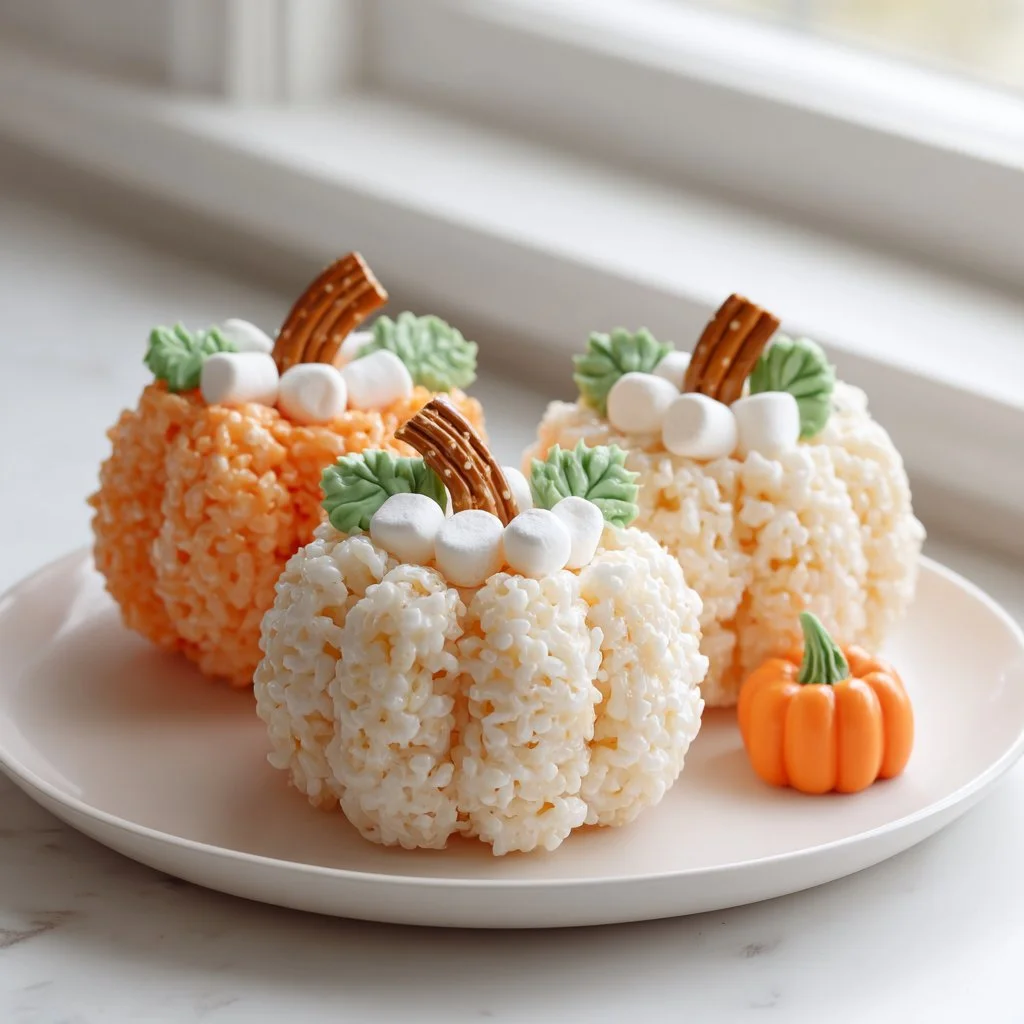
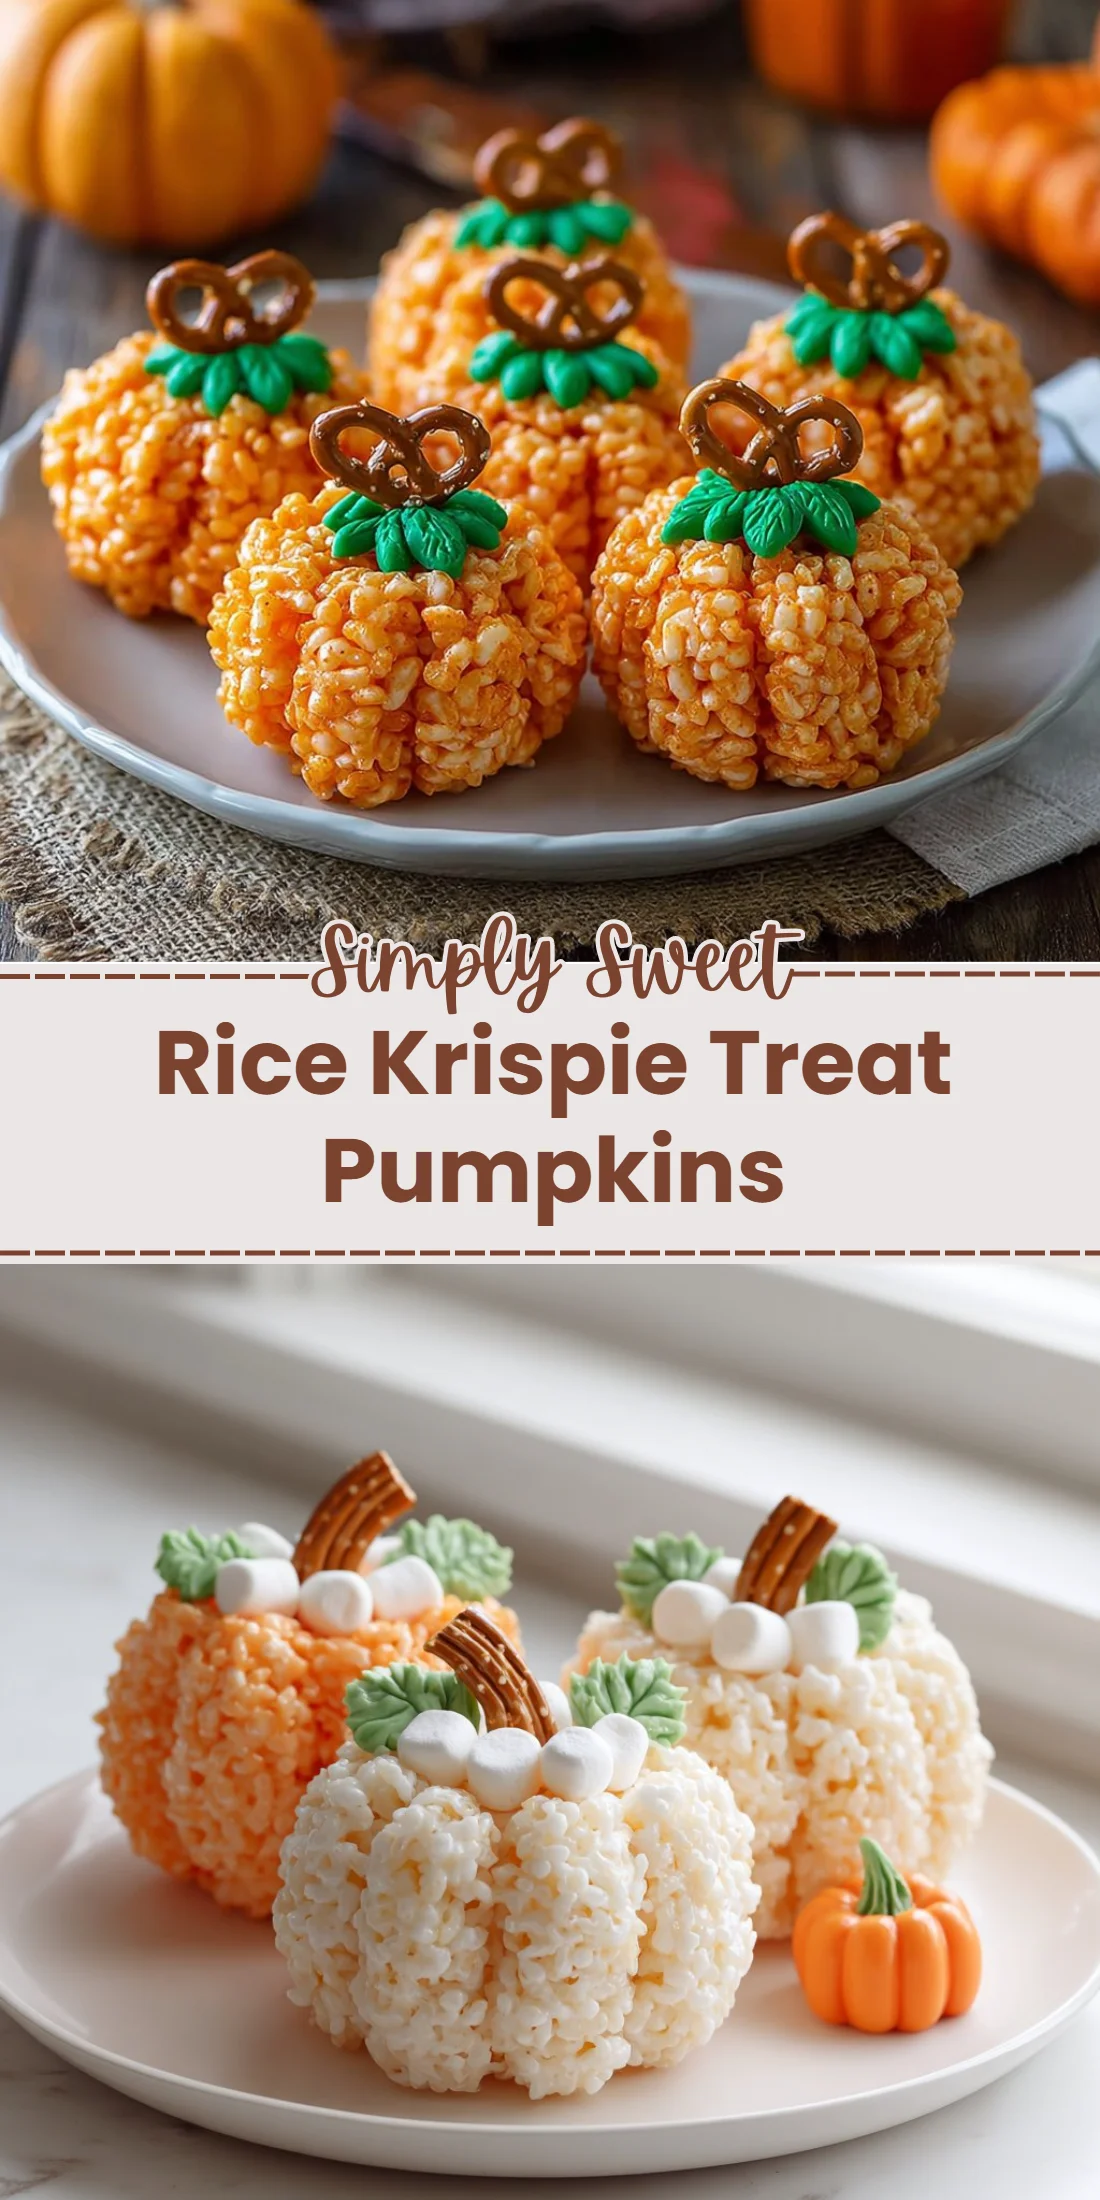
Bright orange, bite-sized, and impossible to resist — these Rice Krispie Treat Pumpkins are a quick seasonal treat that looks like you spent hours on them. They’re children-friendly, party-ready, and perfect for Halloween or a fall bake sale.
The recipe is simple enough for a weeknight craft, but impressive enough to steal the show at a holiday spread.
Follow the steps below and you’ll have pumpkin-shaped Rice Krispies that are chewy, sweet, and perfectly sticky for decorating.
Why You’ll Love This Rice Krispie Treat Pumpkins
– Fast to make in under 30 minutes.
– Kid-friendly assembly and decorating.
– Uses pantry staples you probably already own.
– Customizable color and size for any party.
– No baking required, great for quick entertaining.
– Shelf-stable for a few days, easy to transport.
These Rice Krispie Treat Pumpkins deliver classic marshmallow chew with a crisp cereal snap and a smooth buttery finish. The orange gel gives a vibrant pumpkin hue without watering down the marshmallow gloss, and the pretzel stem adds a salty crunch that balances the sweetness.
“These were the hit of our fall party — bright color, soft chew, and so cute. My kids helped shape them and we gobbled them up in an hour. Five stars!” — Jenna R.
Key Ingredients for Rice Krispie Treat Pumpkins
Rice Krispies cereal — 6 cups
Rice Krispies provide the crisp, airy backbone of the treats. Choose the original plain rice cereal for the classic texture; flavored or chocolate varieties change sweetness and moisture absorption. If you substitute with puffed quinoa or puffed millet, expect a denser result and a different mouthfeel.
Salted butter — 3 Tbsp
Butter adds richness and helps the marshmallows melt into a smooth binder. Salted butter gives a subtle savory contrast; if using unsalted, add a pinch of salt to lift flavors. Using margarine or a plant-based spread reduces flavor depth and can make the set tackier.
Mini marshmallows — 1 pkg (10 oz)
Marshmallows are the glue and the primary source of chew. Mini marshmallows melt faster and distribute more evenly; large marshmallows work but require more stirring and slightly higher heat. Substituting with marshmallow fluff will change the texture (smoother but stickier) and may need less butter.
Orange gel food coloring — as needed
Gel coloring provides vivid pigment without adding liquid that can change consistency. Gels concentrate color so a little goes a long way; liquid coloring can make the mixture wetter and harder to set. Natural alternatives like carrot powder or annatto may tint but won’t reach the same bright orange.
Full Ingredient List for Rice Krispie Treat Pumpkins
– Rice Krispies cereal – 6 cups
– Salted butter – 3 Tbsp
– Mini marshmallows – 1 pkg (10 oz)
– Orange gel food coloring – as needed
– Pretzel rods – 3 rods (broken into 2-inch pieces)
– Mini green Airheads or green fondant – 6 pieces
– Non-stick cooking spray – for hands and tray
Step-by-Step Instructions for Rice Krispie Treat Pumpkins
Step 1: Measure and prep the cereal
Measure out the Rice Krispies and set them in a large bowl so they’re ready to fold in. Break pretzel rods into 2-inch pieces and set out the Airheads or fondant for leaves. Spray your hands and a tray with non-stick cooking spray to prevent sticking during shaping.
Pro Tip: The cereal should look dry and fluffy in the bowl — not compacted or clumped.
Step 2: Melt the butter
In a large non-stick pot, melt the 3 tablespoons of salted butter over medium-low heat. Keep the heat low to avoid browning; you want melted butter, not sizzling or foaming. Stir gently so the butter becomes uniformly liquid.
Pro Tip: The butter should be fully melted with tiny bubbles around the edge, not browned or smelling nutty.
Step 3: Add marshmallows and color
Add the mini marshmallows to the melted butter and stir as they soften. As they begin to melt, add orange gel food coloring a little at a time until you reach a vibrant pumpkin orange. Stir until the mixture is smooth, glossy, and uniformly colored.
Pro Tip: The mixture should look glossy and viscous with no visible marshmallow chunks and a bright, even orange color.
Step 4: Combine cereal and marshmallow
Once melted and smooth, remove the pot from heat. Immediately fold in the Rice Krispies cereal using a spatula until every piece is coated. Work quickly but gently to keep the cereal from getting crushed and to ensure even coating.
Pro Tip: The cereal should be thoroughly coated and slightly glossy; if you see dry cereal, the mixture hasn’t been folded enough.
Step 5: Cool slightly and prepare to shape
Allow the mixture to cool for a few minutes until it’s safe to handle but still pliable. Spray your hands with non-stick spray to prevent sticking and to speed shaping. Keep the mixture warm enough to mould easily but not so hot it burns.
Pro Tip: When you press a small piece into a ball, it should hold shape without sticking heavily to your fingers.
Step 6: Shape pumpkins and add stems
Shape the cereal mixture into balls roughly the size of a baseball, compressing just enough to hold. Press a 2-inch pretzel piece into the top center of each ball to form the stem. Use gentle pressure so the pretzel embeds but the ball keeps its rounded pumpkin look.
Pro Tip: Each pumpkin should be rounded with slight ribs from your fingers and a firm pretzel stem sitting upright.
Step 7: Cut leaves, make vines, and attach
Cut leaf shapes out of the green Airhead candy using clean scissors. Roll the scraps into thin ropes for vines and attach the leaves and vines to the top of each pumpkin near the pretzel stem. Press pieces lightly so they adhere to the marshmallow surface.
Pro Tip: Leaves should be flat against the top and vines thin and flexible; if candy stiffens, warm slightly with your hands.
Step 8: Store
Once decorated, place the pumpkins on a lined tray and allow them to set for 10–15 minutes. Store the treats in an airtight container at room temperature for up to 3 days for best texture.
Pro Tip: The pumpkins should feel slightly firm on the outside but still soft and chewy inside.
Expert Tips for Rice Krispie Treat Pumpkins
– Temperature tips: Keep heat at medium-low when melting butter and marshmallows to avoid scorching and grainy texture.
– Coloring tips: Use gel coloring dropped into the melted marshmallow; stir until fully incorporated for even color.
– Texture troubleshooting: If treats are too hard, you likely overcooked marshmallows or added too much pressure when shaping. Let the mixture cool less and shape more gently next time.
– If too sticky: Chill the mixture for 5–8 minutes and lightly oil hands. Excess stickiness often means overuse of liquid coloring or very high humidity.
– Equipment tips: Use a large non-stick pot and a silicone spatula; these reduce scraping and cleanup and help maintain glossy marshmallow texture.
– Shaping tools: A small ice cream scoop can help make uniformly sized pumpkins before you refine the shape by hand.
– Common mistakes: Working with marshmallows at too-high heat causes separation and a gritty mouthfeel; always remove from heat early and rely on residual warmth to finish melting.
– Decoration timing: Attach candy leaves and vines while the surface is still slightly tacky so they adhere naturally without additional edible glue.
Storage & Freezing for Rice Krispie Treat Pumpkins
Room temperature: Store in an airtight container at room temperature for up to 3 days. Place wax or parchment paper between layers to avoid sticking. Keep away from direct sunlight or heat to prevent melting.
Fridge storage: You can refrigerate in an airtight container for up to 1 week; refrigeration firms the texture and can make pumpkins chewier. Allow them to warm briefly at room temperature before serving for best chew.
Freezer storage: Wrap each pumpkin individually in plastic wrap, then place in a freezer-safe bag or container for up to 3 months. Removing as much air as possible prevents freezer burn.
Thawing and reheating: Thaw overnight in the refrigerator or a few hours at room temperature. Do not microwave wrapped pumpkins; if you need to soften slightly, unwrap and warm in 5–7 second bursts at low power, checking frequently.
Variations & Substitutions for Rice Krispie Treat Pumpkins
Spiced Pumpkin Rice Krispie Treats: Add 1/2 to 1 teaspoon pumpkin pie spice into the melted marshmallow for warm fall flavor. The spice blends with the butter-marshmallow base and makes the treats taste more pumpkin-like even without pumpkin puree.
Chocolate-stem Pumpkin Treats: Dip the pretzel stems in melted dark or milk chocolate before inserting into the tops. This adds a rich contrast to the sweet marshmallow and makes the stem more decorative and flavorful.
Miniature Pumpkins for Cupcakes: Make smaller, golf-ball-sized pumpkins and use a toothpick instead of a pretzel for miniature stems. These are ideal for cupcake toppers or bite-sized party favors and set faster because of their smaller mass.
Vegan Rice Krispie Pumpkins: Use vegan marshmallows and a plant-based butter; ensure the rice cereal is vegan (no added dairy). Texture may be slightly different — a bit chewier — but the shape and festive look remain the same.
Frequently Asked Questions About Rice Krispie Treat Pumpkins
Q: How long will Rice Krispie Treat Pumpkins stay fresh?
A: Stored in an airtight container at room temperature, they stay best for about 2–3 days. After that they may lose crispness and become chewier. Refrigerating extends freshness to about one week, though the exterior becomes firmer.
Q: Can I use flavored rice cereal instead of Rice Krispies?
A: Yes, but flavored cereals alter sweetness and texture. Chocolate or cocoa-flavored cereal will make treats denser and change the classic flavor; adjust marshmallow or butter to balance sweetness.
Q: Why did my marshmallow mixture become grainy?
A: Graininess usually comes from overheating marshmallows or letting the sugar seize. Melt marshmallows on medium-low, stir continuously, and remove from heat as soon as smooth. If sugar crystallizes, a splash of corn syrup in the marshmallow mix can help next time.
Q: How can I make the pumpkins more orange without affecting texture?
A: Use gel food coloring concentrated in small amounts and stir thoroughly. Avoid liquid dye which adds moisture. If you need deeper color, add more gel in tiny increments rather than switching to a liquid.
Q: Can I make these ahead for a party?
A: Yes. For best appearance and texture, make them the day before and store in an airtight container. If making further ahead, freeze individually wrapped pumpkins and thaw the day of the event.
Final Thoughts on Rice Krispie Treat Pumpkins
These Rice Krispie Treat Pumpkins are an easy, colorful fall project that delivers great texture and party curb appeal. Please leave a star rating in the recipe card below and pin this idea to your Pinterest boards for later inspiration.
You can find a similar pumpkin-shaped take on Rice Krispie treats at Pumpkin-Shaped Rice Krispie Treats – Cooking Classy, a step-by-step variant at Rice Krispie Treat Pumpkins | An Easy Halloween Treat Idea, and another playful recipe at Pumpkin Rice Krispie Treats – Just is a Four Letter Word.
Rice Krispie Treat Pumpkins
Ingredients
Method
- Measure out the Rice Krispies and set them in a large bowl. Break pretzel rods into 2-inch pieces and set out Airheads or fondant for leaves. Spray hands and tray with non-stick cooking spray.
- In a large non-stick pot, melt butter over medium-low heat until fully liquid, avoiding browning.
- Add mini marshmallows to melted butter, stirring until smooth. Gradually mix in orange gel food coloring until reaching desired hue.
- Remove pot from heat and fold in Rice Krispies until evenly coated.
- Allow mixture to cool slightly; then, using greased hands, shape into balls and insert pretzel pieces for stems.
- Cut out leaf shapes from green candy and attach to the top of each pumpkin, optionally adding 'vines' from candy scraps.
- Place pumpkins on a lined tray to set for 10-15 minutes in an airtight container at room temperature.