
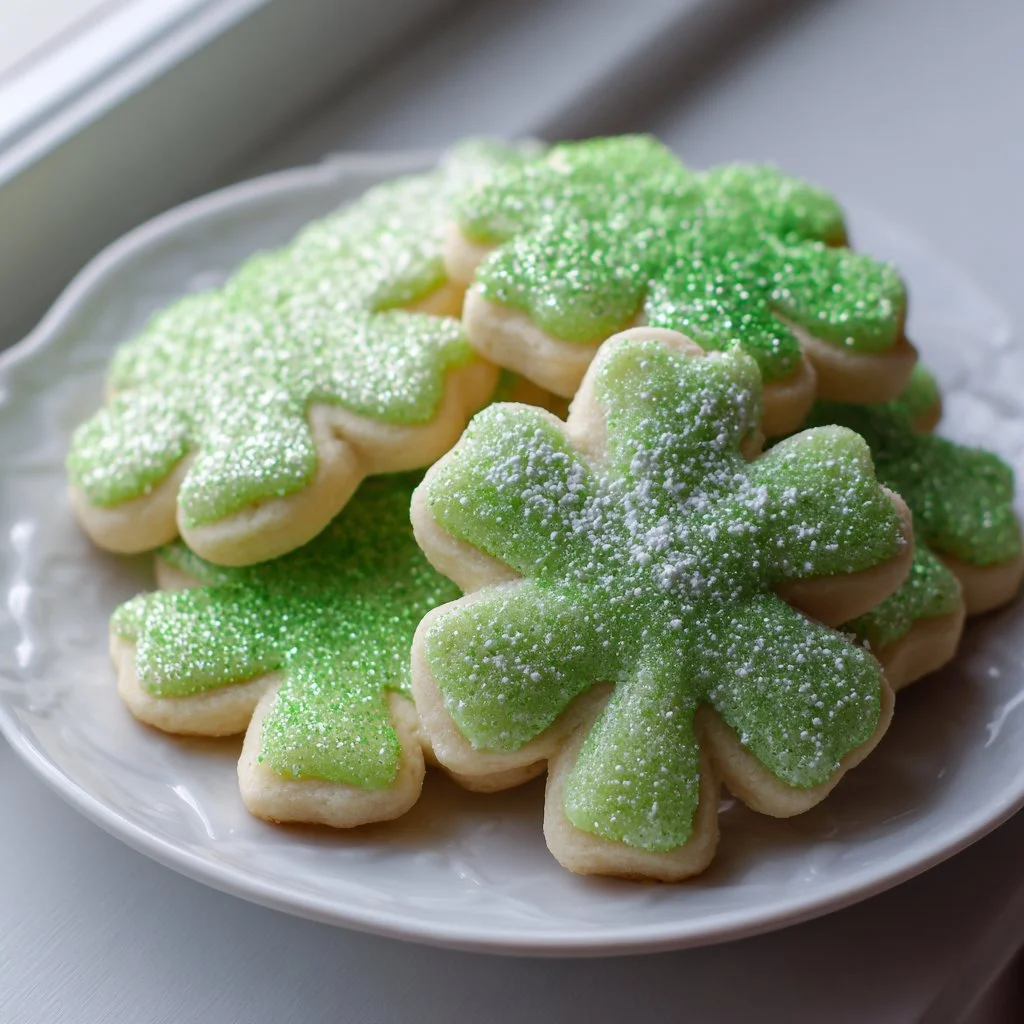
Bright, buttery, and perfect for St. Patrick’s Day, these shamrock-shaped sugar cookies bring holiday cheer to any cookie tray.
They’re simple enough for a weeknight bake, but elegant enough for gifting.
Roll, cut, chill, and decorate — fun for adults and kids alike.
Why You’ll Love This Shamrock Sugar Cookies
– Classic buttery flavor that isn’t overly sweet.
– Crisp edges with a tender, slightly cakey center.
– Easy roll-and-cut dough that holds shape for detailed cutters.
– Royal-icing-style frosting that dries smooth and glossy.
– Kid-friendly decorating that still looks professional.
– Makes a large batch for parties and classroom exchanges.
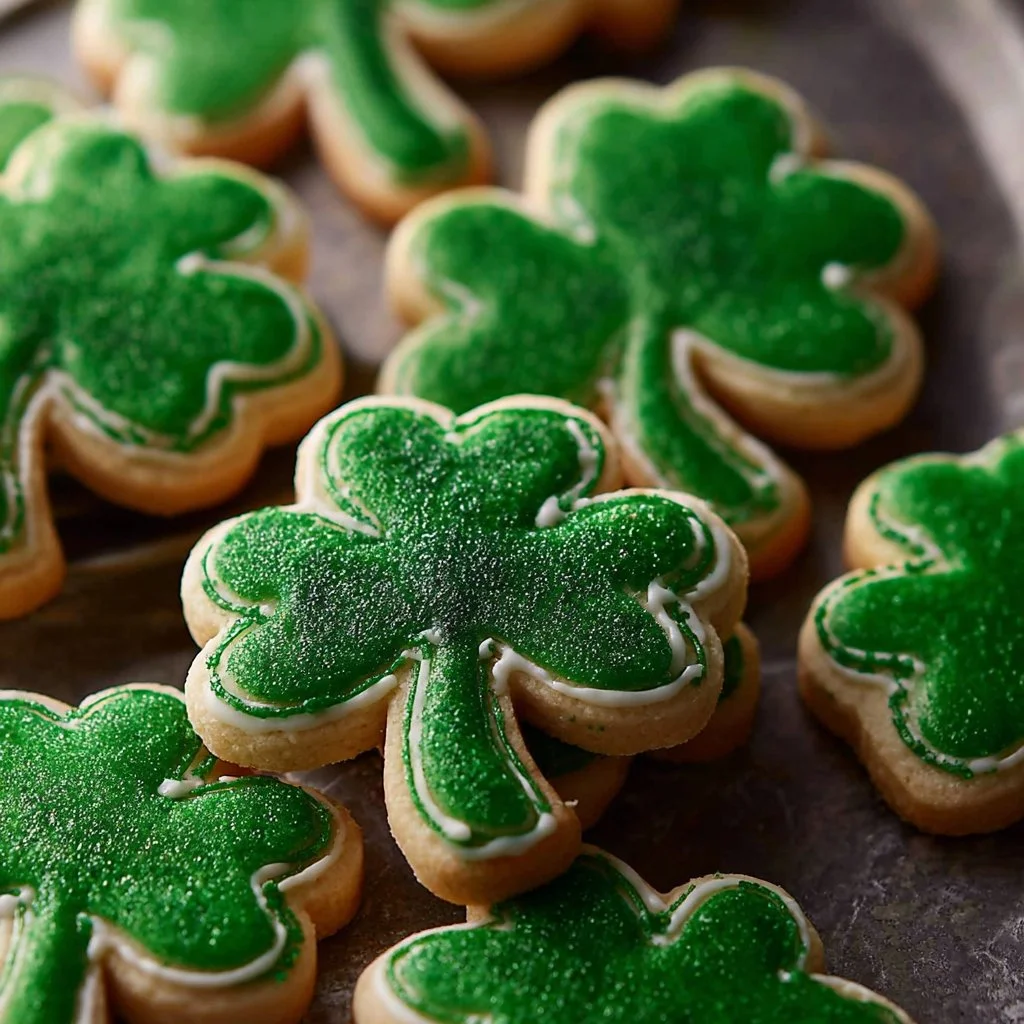
These cookies taste like old-fashioned bakery sugar cookies with a modern icing finish. The texture balances a crisp rim with a soft interior that melts on the tongue, while the icing adds a glossy, slightly sweet chew that sets firm. The shamrock shape keeps each cookie festive and perfect for stacking.
"★★★★★ These cookies were the hit of our St. Patrick’s Day party — perfectly shaped, buttery, and the icing dried smooth. I used the almond extract and got rave reviews." — A satisfied reader
Key Ingredients for Shamrock Sugar Cookies
Butter, softened: Butter provides the rich flavor and tender crumb that defines a proper sugar cookie. Buy European-style butter for higher fat and a more pronounced flavor, or use unsalted so you can control salt levels. If you substitute margarine or a low-fat spread, expect a flatter, less flavorful cookie and a different mouthfeel.
All-purpose flour: This gives the cookie structure without making it tough. Choose a well-known brand and spoon-and-level the flour into your measuring cup for accuracy. If you replace it with cake flour, cookies will spread less and be more delicate; bread flour will make them dense and chewier.
Granulated sugar: Sugar not only sweetens but contributes to the cookie’s texture and browning. Use regular granulated sugar; superfine will make the dough smoother but isn’t necessary. Reducing sugar changes texture — cookies may be paler and less crisp at the edges.
Powdered sugar (for icing): Powdered sugar (confectioners’ sugar) is essential for a smooth, pipeable icing that dries glossy. Look for a brand with a fine grind for lump-free mixing. Replacing it with granulated sugar will create a gritty, undrinkable icing and will not set properly.
Full Ingredient List for Shamrock Sugar Cookies
– All-purpose flour – 3 cups
– Baking powder – 1 tsp.
– Kosher salt – 1/2 tsp.
– Butter, softened – 1 cup (2 sticks)
– Granulated sugar – 1 cup
– Large egg – 1
– Milk (for dough) – 1 Tbsp.
– Pure vanilla extract – 1 tsp.
– Powdered sugar – 5 cups
– Light corn syrup – 1/3 cup
– Milk (for icing) – 1/4 cup
– Almond extract – 1/4 tsp.
– Green food coloring – as needed
Step-by-Step Instructions for Shamrock Sugar Cookies
Step 1: Whisk dry ingredients
Whisk the all-purpose flour, baking powder, and kosher salt together in a large bowl until evenly combined. This distributes the leavening and salt throughout so cookies bake uniformly.
Pro Tip: The flour mixture should look homogenous with no visible specks of baking powder.
Step 2: Cream butter and sugar
Beat the softened butter and granulated sugar with a mixer until the mixture is pale and fluffy, about 2–3 minutes. This step traps air and helps the cookies rise slightly while keeping a tender crumb.
Pro Tip: The creamed mixture should look light yellow and airy, with sugar crystals mostly dissolved.
Step 3: Add egg and flavorings
Mix in the large egg, 1 tablespoon milk, and 1 teaspoon pure vanilla extract until combined. The egg provides structure and moisture; the milk softens the dough slightly for rolling.
Pro Tip: The batter will look glossy when the egg is fully incorporated.
Step 4: Incorporate the dry ingredients
Gradually add the flour mixture to the butter mixture, mixing on low just until combined. Avoid overmixing to keep cookies tender. Scrape the bowl and fold any remaining flour with a spatula.
Pro Tip: The dough should pull away from the bowl but still feel slightly soft, not dry or crumbly.
Step 5: Chill the dough
Shape the dough into a flat disk, wrap tightly in plastic wrap, and refrigerate for 1 hour. Chilling firms the butter so the cookies hold their shamrock shape during baking.
Pro Tip: After chilling, the disk should be firm but still pliable when pressed.
Step 6: Prepare to roll and preheat oven
Preheat the oven to 350ºF and line baking sheets with parchment paper. Allow the chilled dough to sit for a few minutes if too hard to roll.
Pro Tip: Sheets should be cool and flat; parchment should lie smooth to prevent hot spots.
Step 7: Roll and cut shapes
Roll the dough to about 1/8” thickness on a lightly floured surface and cut with a shamrock cutter, pressing straight down for clean edges. Transfer cutouts to the prepared baking sheets.
Pro Tip: The edges of each cutout should be crisp and well defined before chilling.
Step 8: Freeze cutouts briefly
Place the baking sheet with cut shapes in the freezer for 10 minutes before baking to set the edges and reduce spreading. This keeps the shamrock centers distinct.
Pro Tip: After freezing, the dough should feel very cold and slightly firm to the touch.
Step 9: Bake until edges are barely golden
Bake the cookies for 8–10 minutes, watching closely until the edges are barely golden. Overbaking will make them dry. Remove to a rack and cool completely before icing.
Pro Tip: The cookie centers may look slightly soft but should feel set when gently touched.
Step 10: Make the icing
Whisk the powdered sugar, light corn syrup, 1/4 cup milk, and 1/4 tsp almond extract until smooth and lump-free. Divide into bowls for thick piping and thinner flooding consistencies, tinting with green food coloring as desired.
Pro Tip: Thick icing holds a peak and pipes clean borders; thinned icing should flow slowly off the spoon.
Step 11: Pipe, flood, and finish
Pipe a thick icing border around each cooled cookie, then thin the remaining icing slightly with milk and flood the centers. Use a toothpick to pop any bubbles and to gently spread icing to the edges if needed. Let dry completely before stacking.
Pro Tip: Flood icing should self-level within a minute; surface should look glossy and ultra-smooth when ready to dry.
Expert Tips for Shamrock Sugar Cookies
– Chill time matters: a full hour in the fridge makes cutting cleaner and minimizes spread.
– Oven temperature: use an oven thermometer; 350ºF on the dial can vary, and even 10º can change edge browning and bake time.
– Texture fix: if cookies are too tough, reduce mixing time and use slightly less flour by spooning and leveling.
– Rolling consistency: keep dough between parchment sheets for even thickness and less sticking.
– Icing flow: test icing on a spare cookie — borders should hold, flood should level in 30–60 seconds.
– Equipment tip: a silicone baking mat or high-quality parchment prevents hot spots and promotes uniform browning.
– Common mistake: overworking the dough warms butter and creates spreading; work quickly and chill as instructed.
– Decoration speed: work in small batches when flooding; the icing skins over faster in warm, dry rooms, causing visible seams.
Storage & Freezing for Shamrock Sugar Cookies
Fridge storage: Keep iced cookies in a single layer in an airtight container in the refrigerator for up to 5 days. Use parchment between layers if stacking and ensure icing is fully set before sealing.
Freezer storage: Freeze uniced baked cookies in a single layer on a tray until firm, then transfer to a freezer-safe container or bag for up to 3 months. For iced cookies, freeze on a tray until solid, then layer with parchment; they’ll keep 1–2 months.
Thawing: Thaw frozen cookies in the refrigerator overnight to prevent condensation. Bring to room temperature before serving to avoid soggy texture.
Reheating: Warm cookies briefly in a 200ºF oven for 3–4 minutes to refresh texture, but avoid melting the icing. Use pie tins or sheets, not stacked.
Variations & Substitutions for Shamrock Sugar Cookies
Lemon Shamrock Sugar Cookies: Substitute 1/2 teaspoon lemon extract for vanilla and add 1 teaspoon lemon zest to the dough. The result is a bright, zesty cookie that pairs beautifully with a pale green or white icing.
Almond-lean Shamrock Sugar Cookies: Increase almond extract to 1/2 teaspoon in the icing and use almond flour for 1/2 cup of the all-purpose flour (do not exceed). You’ll get a delicate nutty aroma and slightly more tender crumb.
Gluten-light Shamrock Sugar Cookies: Replace 1:1 with a gluten-free all-purpose flour blend that contains xanthan gum. Expect a slightly crumblier texture; chill the dough a bit longer to help it hold shape.
Vegan Shamrock Sugar Cookies: Use vegan butter and a flax egg (1 Tbsp ground flax + 3 Tbsp water) and swap milk for a plant milk. Flavor will shift slightly, and cookies may bake a touch thinner—chill well and reduce bake time if needed.
Frequently Asked Questions About Shamrock Sugar Cookies
Q: How do I stop my sugar cookies from spreading?
A: Ensure butter is properly chilled and dough is cold when cutting and baking. Spoon-and-level your flour for accuracy and avoid over-creaming butter and sugar. Freeze cutouts for 10 minutes before baking and use parchment or a silicone mat to avoid hot spots.
Q: Can I make the dough ahead of time?
A: Yes. Dough can be wrapped tightly and chilled for up to 48 hours or frozen for up to 1 month. Thaw overnight in the refrigerator before rolling and cutting for best results.
Q: Why is my icing runny or not setting?
A: Icing that’s too thin won’t set; adjust by adding a little more powdered sugar for thickness or a touch more corn syrup for shine. Humidity slows drying — use a dehumidified room or fan to accelerate setting.
Q: How do I fix cracked or dry cookies?
A: Overbaking and too much flour cause dryness. Trim bake time by a minute or two and measure flour correctly. If already dry, sandwich cookies with a thin layer of jam or icing to restore moisture.
Q: Can I use food coloring without altering icing texture?
A: Yes, but gel or paste food coloring is best because it adds color without thinning the icing. Liquid food coloring may thin the icing and require extra powdered sugar to rebalance.
Final Thoughts on Shamrock Sugar Cookies — Conclusion
These Shamrock Sugar Cookies are cheerful, delicious, and reliable for bakers of all levels. If you enjoyed this recipe, please leave a star rating in the recipe card below and pin it to Pinterest for later.
For more shamrock cookie ideas and visual inspiration, check this version with ombre icing on Lucky Shamrock Sugar Cookie Recipe with Ombre Icing.
For an alternate take and step photos that pair well with this method, see the recipe at Shamrock Cookies – If You Give a Blonde a Kitchen.
For a classic reference and additional tips, compare notes with the original technique on Shamrock Sugar Cookies Recipe – Crazy for Crust.
Shamrock Sugar Cookies
Ingredients
Method
- Whisk the all-purpose flour, baking powder, and kosher salt together in a large bowl until evenly combined.
- Beat the softened butter and granulated sugar with a mixer until pale and fluffy, about 2–3 minutes.
- Mix in the egg, milk, and vanilla extract until combined.
- Gradually add the flour mixture to the butter mixture, mixing just until combined.
- Shape the dough into a flat disk, wrap tightly in plastic wrap, and refrigerate for 1 hour.
- Preheat the oven to 350ºF and line baking sheets with parchment paper.
- Roll the dough to about 1/8” thickness and cut with a shamrock cutter.
- Place the cut shapes in the freezer for 10 minutes before baking.
- Bake for 8–10 minutes until the edges are barely golden.
- Remove to a rack and cool completely before icing.
- Whisk powdered sugar, corn syrup, milk, and almond extract until smooth.
- Pipe a thick icing border around each cookie, flooding the centers with thinner icing.
- Let dry completely before stacking.