
Warm, rustic, and fast — this Irish soda bread recipe gives you a hearty loaf without yeast or long proofing.
It bakes in under an hour and fills the kitchen with a browned-butter aroma.
Perfect for weekday breakfasts or a show-stopping addition to a dinner table.
Simple pantry ingredients make this an accessible recipe for beginners and a reliable standby for experienced bakers.
Read on for ingredient science, step-by-step visuals, troubleshooting, and creative twists to make the loaf your own.
Why You’ll Love This Irish Soda Bread Recipe
- No-yeast, fast bake — ready in under an hour.
- Tender crumb with a crisp, golden crust.
- Uses everyday pantry staples.
- Buttery gloss from basting for extra flavor.
- Forgiving dough — minimal kneading required.
- Great for toasting and sandwiches the next day.
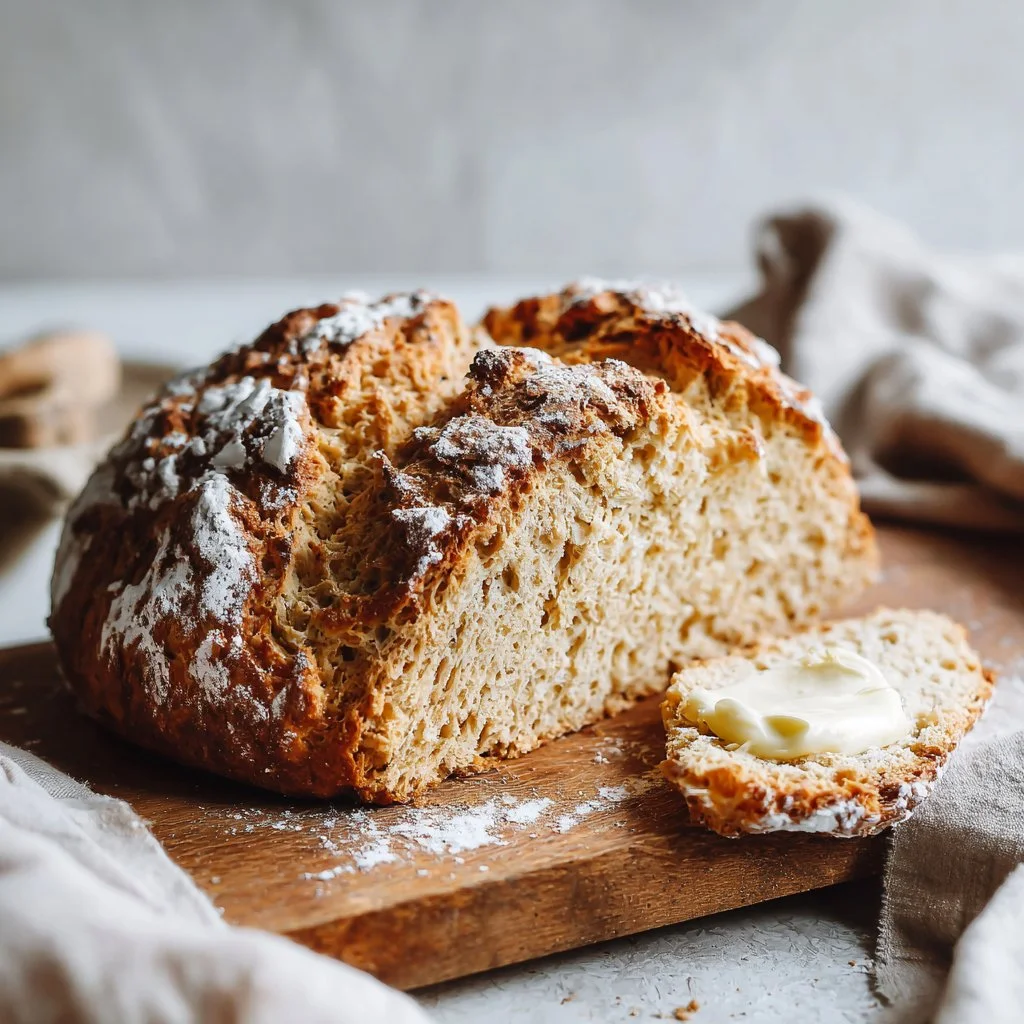
Irish soda bread has a pleasantly dense yet tender crumb thanks to baking soda and buttermilk. The exterior bakes to a deep golden-brown and the frequent basting with melted butter and buttermilk creates a glossy, slightly savory crust that contrasts the soft interior. Expect a loaf that slices cleanly, with a subtle tang from the buttermilk and a buttery finish that keeps the bread moist for days.
"Absolutely delicious — golden crust, tender inside, and so easy. I made this for St. Patrick’s Day and everyone asked for the recipe. 5/5!" — A delighted reader
Key Ingredients for Irish Soda Bread Recipe
All-purpose flour
All-purpose flour provides the structure for the loaf while keeping it tender. Choose a dependable brand and spoon-and-level your cups when measuring to avoid dense results. If you substitute with whole-wheat flour, expect a heavier, nuttier loaf and increase the liquid slightly to compensate.
Buttermilk
Buttermilk reacts with baking soda to produce the carbon dioxide that leavens soda bread; it also adds acidity and tang. Use full-fat buttermilk for the best texture and flavor; low-fat versions can yield a drier crumb. If you must substitute, mix 1 cup milk with 1 tablespoon lemon juice or vinegar and let sit 5–10 minutes, but the tang will be slightly different.
Baking soda
Baking soda is the primary leavener for this bread and must be fresh to work effectively. Store it in a cool, dry place and replace it if it sits over six months. If you accidentally use too little, the loaf will be dense; too much creates an off taste and uneven browning.
Butter (softened and melted)
Softened butter folded into the dough contributes richness and tender flakes, while the melted butter used for basting adds shiny color and flavor to the crust. Use unsalted butter so you can control seasoning; if you use salted butter, reduce added salt slightly. Replacing butter with oil will alter both flavor and crust appearance.
Full Ingredient List for Irish Soda Bread Recipe
– All-purpose flour — 4 cups
– Granulated sugar — 4 tbsp
– Baking soda — 1 tsp
– Baking powder — 1 tbsp
– Salt — 1/2 tsp
– Softened butter — 1/2 cup
– Melted butter — 1/4 cup (for basting)
– Buttermilk — 1 1/4 cups (divided)
– Large egg — 1
Step-by-Step Instructions for Irish Soda Bread Recipe
Step 1: Preheat and prepare
Preheat your oven to 375°F (190°C) and lightly grease a large baking sheet so the loaf slides off easily after baking. A piece of parchment or a well-greased sheet prevents sticking and helps the bottom brown evenly.
Pro Tip: The oven should give a steady, gentle heat; the surface of the greased sheet should feel dry to the touch — not greasy — before placing the dough.
Step 2: Combine dry ingredients
In a large mixing bowl, whisk together the flour, sugar, baking soda, baking powder, and salt until well combined and aerated. This ensures the leaveners are evenly distributed and prevents pockets of metallic or bitter flavor from the soda.
Pro Tip: Visually, the dry mix will look uniformly pale and slightly fluffy with no streaks of sugar or powder visible.
Step 3: Add fat and wet ingredients
Add the 1/2 cup of softened butter, 1 cup of the buttermilk, and the egg to the dry ingredients. Mix with a wooden spoon or your hands until a shaggy dough forms; it should come together but remain slightly rough in texture. Resist adding more liquid — the dough should be firm enough to handle.
Pro Tip: The dough will feel tacky but not wet; you should be able to form it without it sticking to your hands excessively.
Step 4: Brief kneading
Turn the dough out onto a lightly floured work surface. Knead briefly (about 8–10 times) just until the dough is smooth — overworking activates gluten and makes the loaf tough. Keep movements gentle and quick.
Pro Tip: After kneading, the surface should be smooth and slightly elastic, with no visible dry flour patches.
Step 5: Shape the loaf
Shape the dough into a tight round loaf and place it onto the prepared baking sheet. Tuck edges under to create surface tension on top; this helps the loaf rise upward rather than spread outward.
Pro Tip: The shaped loaf should hold a rounded dome and feel evenly firm when you tap the top.
Step 6: Prepare basting mix
In a small bowl, whisk together the 1/4 cup melted butter and the remaining 1/4 cup buttermilk. This basting mixture adds sheen, moisture, and a gentle tang to the crust as the bread bakes.
Pro Tip: The mixture should look homogenous with no separated butter; it will be glossy and pourable.
Step 7: Brush and score
Generously brush the entire loaf with the buttermilk mixture so the crust begins to absorb flavor before baking. Using a sharp knife, cut a deep ‘X’ into the top of the loaf about 1 inch deep to help steam escape and guide the rise.
Pro Tip: The cut should look clean with defined edges; the brushed surface will appear slightly darker and glossy.
Step 8: Bake and baste intermittently
Bake for 45 minutes total. Every 15 minutes, remove the loaf briefly to brush more of the buttermilk mixture over the top, then return to the oven. This creates a layered glaze and encourages a deep golden color without overbrowning.
Pro Tip: During baking, the crust should steadily deepen in color and become fragrant; expect a browned, slightly crackled top after each baste.
Step 9: Test for doneness and cool
The bread is done when a toothpick inserted into the center comes out clean and the loaf sounds hollow when tapped on the bottom. Remove from the oven and cool slightly before slicing so the crumb sets properly.
Pro Tip: When you tap the bottom, the sound should be a dry, hollow ring; the internal temperature, if measured, should be about 200–205°F (93–96°C).
Expert Tips for Irish Soda Bread Recipe
– Use fresh baking soda: test by adding a pinch to vinegar — it should fizz vigorously.
– Measure flour correctly: spoon into the cup and level off to avoid a dense loaf.
– Keep kneading short: 8–10 gentle turns to prevent a tough crumb.
– Maintain oven temperature: a steady 375°F (190°C) gives even rise and browning.
– Baste for color: brushing every 15 minutes builds a glossy, flavorful crust.
– Use a sharp blade to score: a clean cut allows controlled expansion.
– Equipment tip: a heavy baking sheet or pizza stone helps even bottom browning.
– Common mistake: adding too much liquid — dough should be firm and tacky, not sticky.
Storage & Freezing for Irish Soda Bread Recipe
Room temp storage: Wrap the cooled loaf loosely in a clean tea towel and keep it at room temperature for up to 2 days. Avoid airtight plastic at room temp, which softens the crust.
Fridge storage: For up to 4 days, slice and store in an airtight container or resealable bag in the refrigerator. Refrigeration slows staling for a couple extra days but can dry the crumb slightly.
Freezer storage: Slice the loaf and place parchment between slices, then seal in a freezer bag or airtight container for up to 3 months. This prevents freezer burn and makes thawing quicker.
Thawing and reheating: Thaw slices at room temperature for 30–60 minutes. Reheat individual slices in a toaster or oven at 350°F (175°C) for 6–8 minutes until warmed through and the crust crisps again. Whole loaves can be reheated at 325°F (163°C) for 15–20 minutes, tented with foil if browning too fast.
Variations & Substitutions for Irish Soda Bread Recipe
– Honey & Oats: Replace 2 tablespoons of granulated sugar with honey and fold 1/2 cup rolled oats into the dough. The result is slightly sweeter with chewy oat texture and a rustic look.
– Savory Herb & Cheese: Reduce sugar to 1 tablespoon and add 2 tablespoons chopped fresh herbs (like chives and parsley) plus 1/2 cup grated sharp cheddar. Expect a savory loaf that pairs brilliantly with soups and stews.
– Raisin & Caraway: Stir in 3/4 cup raisins and 1 teaspoon caraway seeds to the dry mix. This yields a traditional, slightly sweet bread with aromatic spice notes typical of classic Irish versions.
– Whole-Wheat Swap: Replace 1–1.5 cups of the all-purpose flour with whole-wheat flour and increase buttermilk by 2–4 tablespoons. The loaf will be heartier and slightly denser with added nuttiness.
Frequently Asked Questions About Irish Soda Bread Recipe
Q: Why is my soda bread dense and heavy?
A: Density usually means either old baking soda, too much flour, or overmixing. Test your baking soda for fizz; if it’s weak, replace it. Ensure you measure flour correctly (spoon and level). Mix until the dough just comes together and limit kneading to 8–10 turns.
Q: Can I make this recipe without butter?
A: Yes, you can substitute neutral oil (like vegetable or canola) for the butter, using about 3/4 of the butter amount by volume. The crumb will be slightly different — less flaky and without the browned butter flavor — and you’ll miss the basting gloss, which you can mimic with an oil-and-milk baste.
Q: How do I know when the loaf is fully baked?
A: Two reliable checks are a clean toothpick from the center and a hollow sound when tapping the bottom. A kitchen thermometer should read about 200–205°F (93–96°C) in the center for perfect doneness.
Q: Is buttermilk essential and can I substitute yogurt?
A: Buttermilk’s acidity activates the baking soda, so it’s ideal. Plain yogurt thinned with a little milk can work as a substitute; use equal volumes but whisk to a pourable consistency. The taste will be slightly tangier if using yogurt.
Q: Can I bake this in a loaf pan instead of freeform on a sheet?
A: Yes, but a loaf pan will change the crust-to-crumb ratio and could require 5–10 more minutes of baking. Line the pan with parchment for easy removal and check doneness with a toothpick and the hollow-sound test.
Final Thoughts on Irish Soda Bread Recipe
This Irish Soda Bread Recipe is quick, comforting, and reliably delicious — a perfect loaf to bake any day of the week.
If you enjoyed it, please leave a star rating in the recipe card below and pin this recipe to your favorite boards.
For a simple classic version with two approaches, see Super Simple Irish Soda Bread | Alexandra’s Kitchen.
For a beloved family-style take and extra tips from an experienced baker, check Grandma’s Irish Soda Bread – Sally’s Baking Addiction.
To compare another trusted home-cook method, read Irish Soda Bread Recipe – NatashasKitchen.com.

Irish Soda Bread
Ingredients
Method
- Preheat your oven to 375°F (190°C) and lightly grease a large baking sheet.
- In a large mixing bowl, whisk together the flour, sugar, baking soda, baking powder, and salt.
- Add the softened butter, 1 cup of buttermilk, and the egg to the dry mixture. Mix until a shaggy dough forms.
- Turn the dough out onto a lightly floured surface and knead briefly, about 8–10 times.
- Shape the dough into a round loaf and place on the prepared baking sheet.
- In a small bowl, whisk together the melted butter and the remaining buttermilk for basting.
- Brush the entire loaf with the buttermilk mixture and score a deep 'X' on top.
- Bake for 45 minutes, basting with the buttermilk mixture every 15 minutes.
- The loaf is done when a toothpick comes out clean and it sounds hollow when tapped.
- Allow the bread to cool slightly before slicing.