
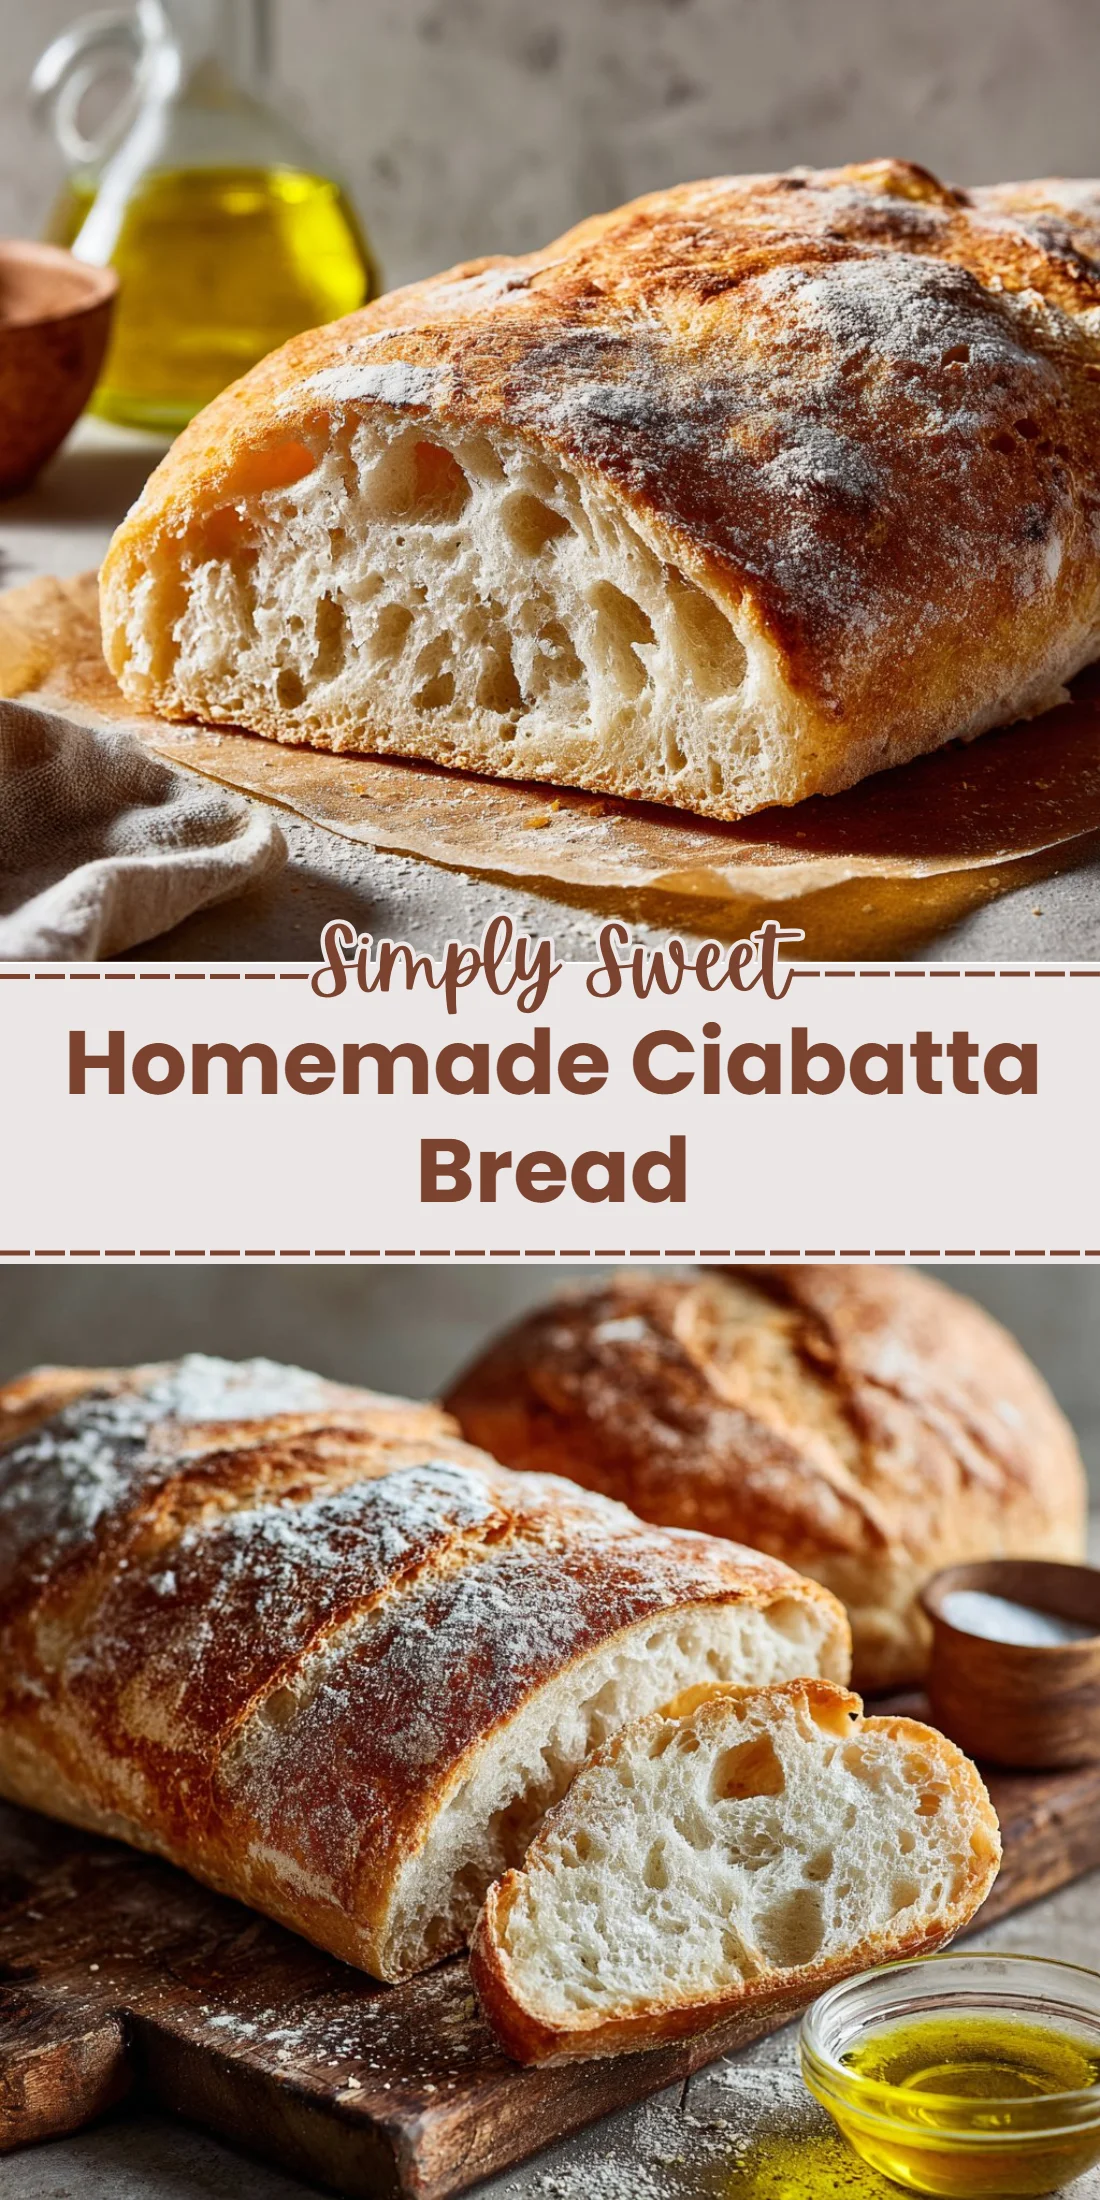
Fresh, crackly, and wildly addictive — this ciabatta comes together with just five pantry staples and a little patience. No fancy equipment required.
The dough is wet and forgiving, which means you get those signature open holes and a crackling crust with minimal fuss. If you’re short on time, try a quick soda bread alongside this loaf for a busy baking day: Irish soda bread offers a fast, rustic contrast.
This recipe is perfect for sandwich nights, dipping, or turning into bruschetta. Read on for the science behind the crumb, troubleshooting visuals, and pro-level tips.
Why You’ll Love This Homemade Ciabatta Bread
- Minimal ingredients, maximum flavor and texture.
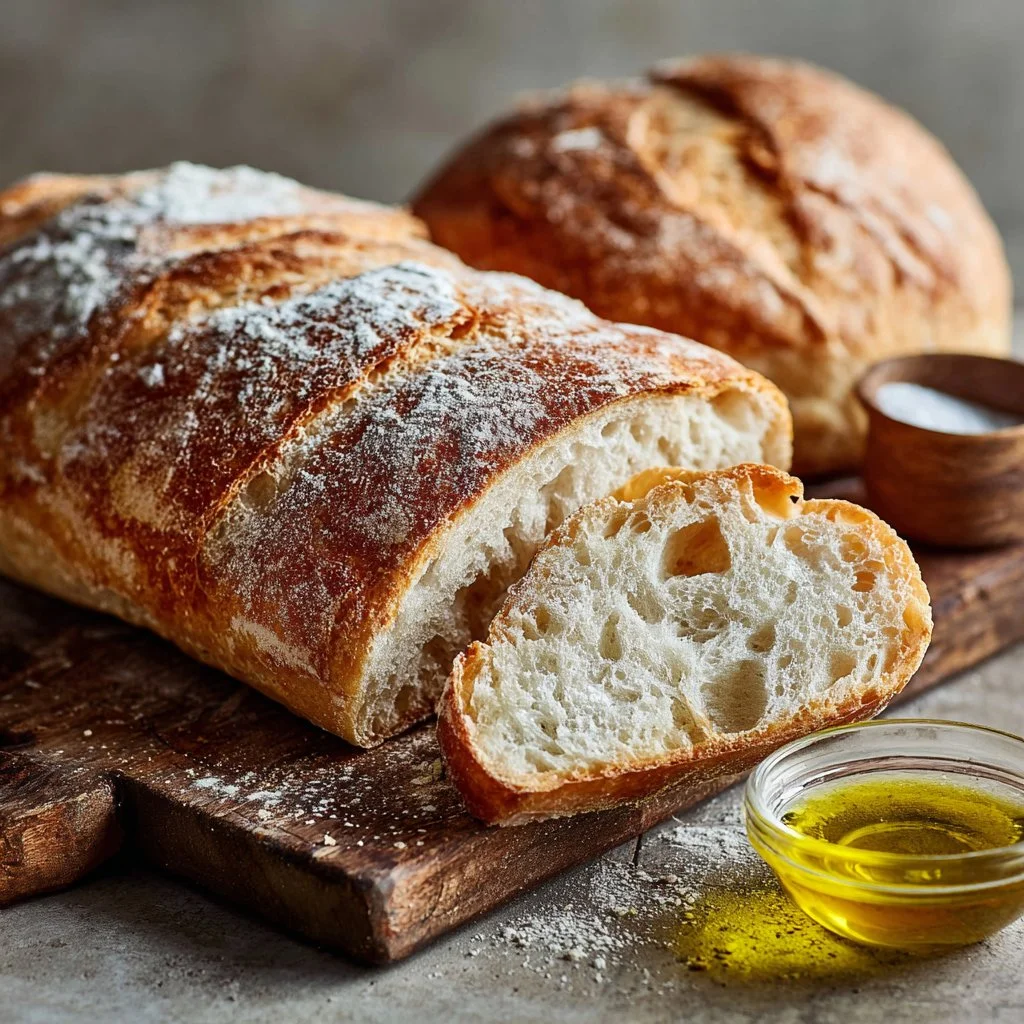
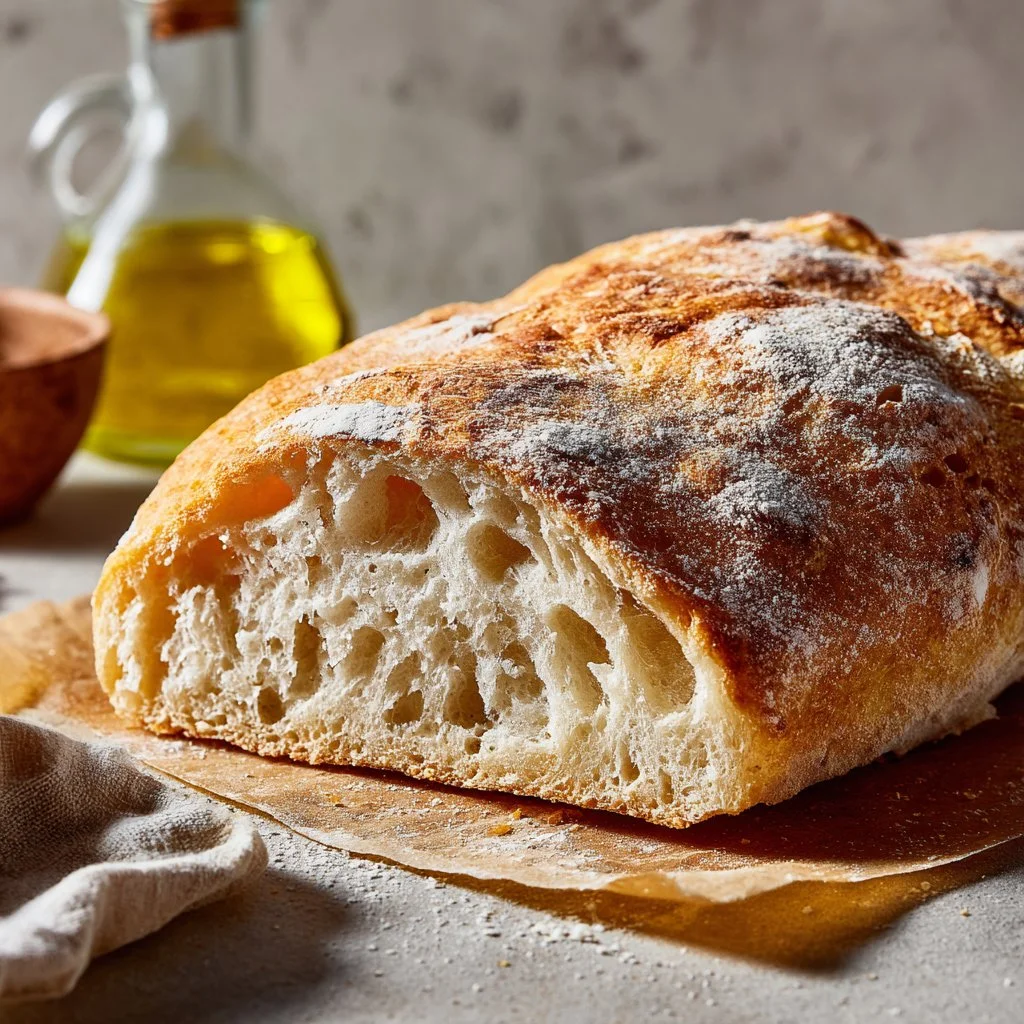
- Rustic open crumb with large, irregular holes.
- Crispy, blistered crust that holds up to hearty fillings.
- Easy to scale for two loaves or one.
- Beginner-friendly technique that rewards patience.
- No bread machine required.
- Great for toasting, dipping, and sandwiches.
This ciabatta tastes slightly nutty from the flour, with a mild olive oil aroma and a chewy interior. The crust is thin and blistered, providing contrast to the soft, airy crumb inside — think crisp exterior and pillowy tunnels that soak up olive oil and tomato juices.
"5 stars — Followed the steps exactly and got a bakery-style crust and huge holes. My family couldn’t believe it’s homemade." — A satisfied reader
Key Ingredients for Homemade Ciabatta Bread
Flour
All-purpose flour provides the structure and chew for this ciabatta. Choose a brand with moderate protein (10–12%) for good gluten formation; if you only have low-protein flour the loaf will be softer and less open. Substituting bread flour will tighten the crumb slightly but improve chew and oven spring.
Water
A high-hydration dough (400ml for 500g flour) creates the open crumb and glossy interior. Use lukewarm water (around 24–27°C / 75–80°F) to help the yeast wake gently; colder water slows fermentation, and hotter water can kill yeast. If your dough seems dry, add water by tablespoon increments until it feels sticky.
Salt
Sea salt not only seasons but tightens gluten slightly and regulates yeast activity. Use a fine sea salt for even distribution; flaky finishing salt is great sprinkled after baking but not an in-dough substitute. Reducing salt will speed fermentation and produce a flatter-flavored loaf.
Olive oil
A tablespoon of olive oil softens the crust slightly and adds subtle fruitiness. Use a good-quality extra-virgin for aroma; a neutral oil will work but won’t contribute flavor. Skipping oil won’t ruin the bread but can make the crust a touch drier.
Full Ingredient List for Homemade Ciabatta Bread
- 500g all-purpose flour
- 400ml water
- 10g sea salt
- 7g active dry yeast
- 1 tablespoon olive oil
Step-by-Step Instructions for Homemade Ciabatta Bread
Step 1: Mix the dry ingredients.
In a large bowl, combine the flour, sea salt, and active dry yeast, keeping the salt a little away from direct contact with the yeast if you’re concerned about immediate contact. Stir briefly to distribute everything evenly.
Pro Tip: The mixture should look uniform and free of clumps; you should see no streaks of salt or clumps of flour.
Step 2: Add water to form a sticky dough.
Gradually pour the 400ml water into the dry mix while stirring with a wooden spoon or dough scraper until a very sticky, shaggy dough forms. The dough will be wetter than typical sandwich bread.
Pro Tip: The dough should coat the spoon and pull in strings; it will be glossy and sticky, not dry or powdery.
Step 3: Knead briefly for gluten development.
Turn the dough out onto a floured surface and knead for about 10 minutes, using a folding and stretching motion to build strength without overworking. The dough should become smoother and more elastic.
Pro Tip: When pressed, the dough should slowly spring back and feel slightly tacky; you should see some windowing if you gently stretch a small piece.
Step 4: First rise until doubled.
Place the dough in a greased bowl, cover tightly with plastic wrap or a damp towel, and let rise in a warm area for 1–2 hours until doubled in size. The timing depends on room temperature.
Pro Tip: Look for a puffy, bulging surface with visible bubbles; a gentle poke should slowly rebound.
Step 5: Preheat the oven to 220°C (428°F).
About 20 minutes before baking, set your oven to 220°C / 428°F so it reaches full heat. A hot oven is crucial for oven spring and crust formation.
Pro Tip: The oven should be hot to the touch when opened briefly; if using a baking stone, it should be preheated for at least 30 minutes.
Step 6: Shape and transfer to baking surface.
Gently shape the dough into a loose rectangle without degassing too aggressively, then transfer to a parchment-lined baking sheet. Dust the top lightly with flour if desired.
Pro Tip: The shaped dough should be slack and airy — avoid compressing it into a tight loaf; you should still see large, irregular bubbles.
Step 7: Rest before baking.
Let the shaped dough rest for another 30 minutes, covered with a damp cloth. This short bench rest relaxes the dough and develops final volume.
Pro Tip: The dough should puff slightly and feel light when lifted; it should not flatten completely.
Step 8: Bake until golden and crusty.
Bake for 25–30 minutes until the crust is deep golden brown and the loaf sounds hollow when tapped on the bottom. Use a hand mirror or oven thermometer to check that internal temperature hits ~96°C (205°F) for fully baked bread.
Pro Tip: Look for blistered crust and deep color; the loaf should have a crisp snap and a fragrant, toasty smell.
Step 9: Cool completely before slicing.
Allow the bread to cool on a rack for at least 30–60 minutes to finish setting the crumb. Slicing too soon will compress the interior and gummy the crumb.
Pro Tip: The interior should feel light and slightly moist, not dense or gelatinous; the aroma will mellow and become more complex as it cools.
Expert Tips for Homemade Ciabatta Bread
- Temperature tips: Ferment at 24–27°C (75–80°F) for steady yeast activity; cooler slows proofing and warmer accelerates it.
- Dough hydration: If your kitchen is dry, the dough may feel stiffer; adjust water by tablespoons to maintain stickiness.
- Texture troubleshooting: If crumb is too tight, increase hydration slightly next bake and shorten kneading; if overly gassy and collapsing, handle gently and reduce proof time.
- Equipment tips: Use a baking stone or preheated heavy sheet for better bottom heat and oven spring.
- Steam is important: For a crisp crust, add steam in the first 8–10 minutes (a pan of water or misting) or use a lidded Dutch oven for similar effect.
- Common mistakes: Overworking the dough removes those big holes; underproofing yields dense crumb. Aim for gentle handling.
- Scoring and shaping: Minimal shaping preserves air pockets — full degassing kills the open crumb.
- Oven-spring focus: Ensure your oven is fully preheated and, if possible, create steam to help the loaf expand before the crust sets.
Storage & Freezing for Homemade Ciabatta Bread
Room temperature (short-term)
Store wrapped in a clean kitchen towel or paper bag at room temperature for up to 2 days to preserve crust and avoid sogginess. Avoid plastic for short-term storage unless you prioritize soft crust.
Fridge storage
Refrigeration dries bread quickly; if you must, wrap tightly in plastic wrap and place in an airtight container for up to 5 days. Expect a firmer crumb and reduced freshness.
Freezer storage
Slice the cooled loaf and place slices or whole loaves in airtight freezer bags or vacuum-sealed bags. Freeze for up to 3 months. Remove excess air to avoid freezer burn.
Thawing and reheating
Thaw frozen slices at room temperature for 10–20 minutes. Reheat whole loaves in a 180°C (350°F) oven for 8–12 minutes, or toast slices directly. For crisp crust, spritz lightly with water and reheat on a baking sheet for a few minutes.
Also try a sweet bite while your loaf rests like buttery shortbread sprinkle bites after a baking session.
Variations & Substitutions for Homemade Ciabatta Bread
Whole-wheat ciabatta
Replace 150–200g of the all-purpose flour with whole-wheat flour and increase water slightly (by 20–30ml) to compensate. The result will be nuttier, denser, and more flavorful, with a slightly firmer crumb.
Olive & rosemary ciabatta
Fold in 2 tablespoons of chopped olives and 1 tablespoon of chopped fresh rosemary during the final stretch before shaping. This yields aromatic pockets and a Mediterranean snack loaf perfect for dipping.
Garlic-herb ciabatta
Add 1–2 teaspoons of garlic powder and 1 tablespoon of mixed dried herbs into the dough mix, or brush with garlic butter after baking. This produces a savory loaf ideal for sandwiches and garlic bread.
Ciabatta rolls (pan-friendlier)
Divide dough into smaller pieces after the first rise and shape loosely into rolls; proof for 20–30 minutes and bake 12–18 minutes. You’ll get crisp-on-the-outside, soft-inside rolls perfect for sliders and individual servings.
Frequently Asked Questions About Homemade Ciabatta Bread
What makes ciabatta different from other breads?
Ciabatta is defined by its high hydration, open crumb, and thin, crisp crust. Unlike tighter sandwich loaves, ciabatta uses a wetter dough and gentler handling to trap large air pockets. This combination creates a chewy interior with large irregular holes and a light structure that’s great for absorbing sauces.
Why is my ciabatta crumb dense instead of open?
Dense crumb usually comes from under-hydration, over-kneading, or underproofing. Ensure your dough is sticky (high hydration) and use gentle folding rather than vigorous kneading to preserve air. Allow adequate proof time in a warm spot until visibly puffed and test with a finger poke — it should slowly rebound.
How do I get a crisp crust without a steam oven?
Create steam by placing an oven-safe pan on the bottom rack and adding hot water just as you put the loaf in, or mist the oven walls with water quickly after loading. Baking on a preheated stone and avoiding opening the oven during the first 10 minutes helps the crust set and blister.
Can I make ciabatta without active dry yeast?
You can substitute instant yeast in a 1:1 ratio, but if you want to use sourdough starter, expect longer fermentation and different flavor. For instant yeast, mix it directly with flour; for active dry, proof it briefly in warm water before adding if desired.
How do I fix a sticky dough that’s impossible to handle?
Sticky ciabatta dough is normal. Use a bench scraper and flour your hands lightly — avoid adding too much flour, which will tighten the dough. Perform wet-hand or oil-hand techniques to shape, and do gentle folds rather than heavy kneading to build structure.
Final Thoughts on Homemade Ciabatta Bread
This Homemade Ciabatta Bread recipe rewards patience with an airy, chewy crumb and a satisfyingly crisp crust. Try the variations and storage tips to make loaves that suit your meals and schedule.
Please leave a star rating in the recipe card below and pin this loaf to Pinterest to save it for later.
Sally’s Baking Addiction ciabatta recipe is a great additional reference for technique inspiration.
For roll-sized ideas and shaping alternatives, see the Homemade Ciabatta Rolls recipe from Sugar Maple Farmhouse.
If you want another perspective on method and visuals, read Alexandra’s Kitchen guide to making ciabatta.
Ciabatta Bread
Ingredients
Method
- In a large bowl, combine the flour, sea salt, and active dry yeast, keeping the salt a little away from direct contact with the yeast. Stir briefly to distribute everything evenly.
- Gradually pour the 400ml water into the dry mix while stirring with a wooden spoon or dough scraper until a very sticky, shaggy dough forms.
- Turn the dough out onto a floured surface and knead for about 10 minutes, using a folding and stretching motion.
- Place the dough in a greased bowl, cover tightly, and let rise in a warm area for 1–2 hours until doubled in size.
- Preheat the oven to 220°C (428°F), about 20 minutes before baking.
- Gently shape the dough into a loose rectangle and transfer to a parchment-lined baking sheet.
- Let the shaped dough rest for another 30 minutes, covered with a damp cloth.
- Bake for 25–30 minutes until the crust is deep golden brown.
- Allow the bread to cool on a rack for at least 30–60 minutes before slicing.