
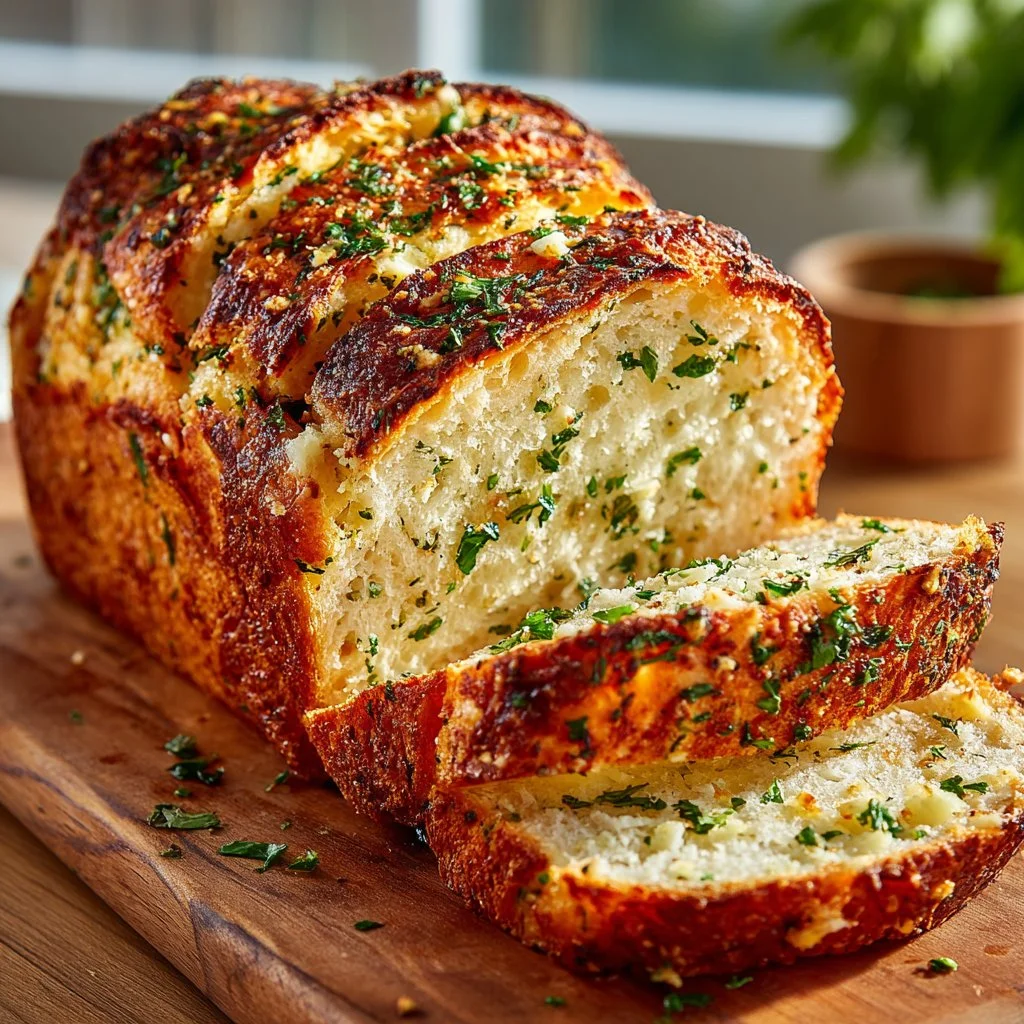
Warm, garlicky bread that pulls apart in cheesy strands—that’s the kind of loaf you’ll want on repeat. This Garlic Parmesan Herb Bread is simple enough for weeknight baking but impressive on any table.
Quick to mix, fragrant while it rises, and crunchy on the outside with a tender crumb inside, it’s a crowd-pleaser that pairs with soups, salads, and pasta. If you’re experimenting with home-baked loaves, this recipe is forgiving and excellent for learning yeast basics.
If you love bold flavors, try small batches of the herb mix or brush extra butter on top for a glossy finish. For more approachable yeast projects, check this handy recipe for buttery shortbread bites to practice measuring and timing: buttery shortbread bites.
Why You’ll Love This Garlic Parmesan Herb Bread
– Bursting with fresh garlic and nutty parmesan flavor.
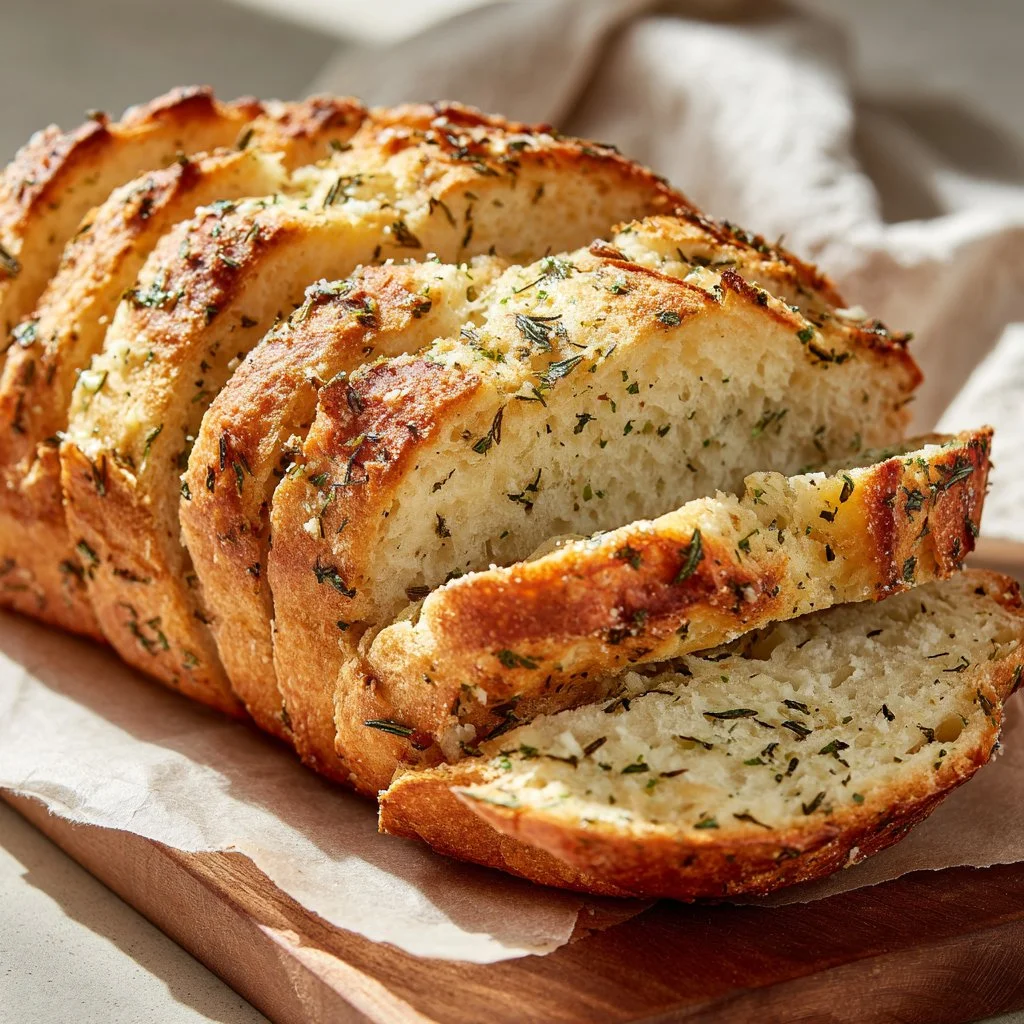
– Crispy golden crust with a soft, herb-speckled interior.
– Quick-rise method that’s ideal for weeknights.
– Uses pantry herbs—no fresh herbs required.
– Highly customizable for add-ins and toppings.
– Great for dipping, serving with soup, or tearing at the table.
This bread balances roasted garlic punch with the salty, umami lift of parmesan and the piney bite of rosemary. The crust develops a satisfying crunch while the inside stays moist and ribboned with garlic and herbs, so each bite has texture contrast and layered flavor.
"Five stars — I made this for family dinner and everyone went back for seconds. The crust was perfectly golden and the inside stayed soft the next day." — A satisfied reader
Key Ingredients for Garlic Parmesan Herb Bread
Pick the top essentials right: water, yeast, garlic, and parmesan make or break this loaf. Below are why they matter, buying tips, and substitution notes.
1 cup warm water (about 100-110°F)
Warm water wakes and activates the yeast without killing it. Use a thermometer if you can—too cool and the yeast is slow; too hot and you’ll kill the yeast and get no rise. If you must substitute, whole milk at the same temperature gives a slightly richer crumb.
1 tablespoon instant dry yeast (Ensure yeast is fresh for optimal rise)
Instant yeast gives fast, reliable rises and can be mixed straight into the flour. Check the expiration and store yeast in the fridge for long life. If you only have active dry yeast, bloom it in the warm water with the sugar first and add about 25% more time for proofing.
6 cloves garlic, finely chopped
Fresh garlic gives bright, sharp aroma that toasted or roasted garlic cannot fully replicate in this quick loaf. Chop finely to distribute flavor evenly; pressing will intensify the garlic. If you substitute with jarred minced garlic, expect a milder, slightly sweeter note—use a touch more to match fresh intensity.
1/3 cup parmesan cheese, grated (Consider adding more on top before baking)
Parmesan delivers savory depth and helps crust browning. Buy a wedge and grate fresh for best melt and flavor; pre-grated powders contain anti-caking agents and can feel grainy. Substitute with Pecorino Romano for saltier, tangier results; reduce added salt slightly if using Pecorino.
Full Ingredient List for Garlic Parmesan Herb Bread
– 1 teaspoon salt
– 1 cup warm water (about 100-110°F)
– 1 tablespoon granulated sugar
– 1 tablespoon instant dry yeast (Ensure yeast is fresh for optimal rise)
– 1 teaspoon dried basil
– 1 teaspoon dried oregano
– 2 teaspoons dried rosemary
– 6 cloves garlic, finely chopped
– 2 to 2½ cups all-purpose flour (Adjust for ideal texture)
– ⅓ cup parmesan cheese, grated (Consider adding more on top before baking)
– 1 tablespoon butter (split for topping) (For brushing on top before baking)
– 2 tablespoons olive oil (For greasing the baking sheet)
Step-by-Step Instructions for Garlic Parmesan Herb Bread
Step 1: Activate and combine
Stir the warm water, sugar, and instant yeast in a large bowl until dissolved. Let sit briefly if using active dry yeast to ensure it bubbles; with instant yeast you can combine immediately with dry ingredients. Add salt, dried basil, oregano, rosemary, chopped garlic, and about half the parmesan, then stir in 2 cups of flour to make a shaggy dough.
Pro Tip: The dough should feel slightly tacky but not sticky; if it sticks to your fingers, add a tablespoon of flour at a time until it comes together. Look for small bubbles forming within 5–10 minutes when yeast is active.
Step 2: Knead to a smooth dough
Turn the dough out onto a lightly floured surface and knead 6–8 minutes by hand, or 4–6 minutes in a stand mixer with a dough hook, until smooth and elastic. Add up to ½ cup more flour only as needed to prevent excess sticking. Return to a lightly oiled bowl, cover, and let rise until doubled in size—about 45–60 minutes in a warm spot.
Pro Tip: The dough should spring back slowly when poked; that gentle spring indicates good gluten development and proper fermentation.
Step 3: Shape and proof
Punch down the risen dough, shape it into a round or oval loaf, and set it on an oiled baking sheet. Brush the top lightly with melted butter and sprinkle remaining parmesan across the surface. Cover loosely and let proof a second time for 20–30 minutes to puff slightly.
Pro Tip: The loaf should look puffy and pillowy after proofing; avoid overproofing—if it collapses or feels weak, it may be overproofed.
Step 4: Bake to golden perfection
Preheat your oven to 400°F (205°C). Bake the loaf for 20–25 minutes until deep golden brown and the internal temperature reaches about 200°F (93°C). If desired, brush with remaining melted butter immediately after removing from oven for added shine and flavor.
Pro Tip: The crust should be a deep golden color and sound hollow when tapped on the bottom—this is the classic visual and auditory cue for doneness.
Expert Tips for Garlic Parmesan Herb Bread
– Temperature tips: Keep water between 100–110°F for instant yeast and slightly cooler for active dry. Room temperature also affects rise time—colder kitchens slow fermentation.
– Texture troubleshooting: If crumbs are dense, knead a few more minutes to build gluten and ensure a strong rise. If crumb is gummy, bake longer or check oven accuracy.
– Equipment tips: Use a digital thermometer to check water and loaf internal temp for reliable results. A stand mixer speeds kneading but hand-kneading gives tactile control.
– Salt balance: Salt strengthens gluten and controls yeast; don’t omit it. If reducing sodium, expect a weaker structure and flatter flavor.
– Herb handling: Crush dried rosemary between fingers before adding to release oils; whole, intact leaves can be sharp and fibrous.
– Garlic intensity: For a milder aroma, roast the garlic first; for punchy flavor, fold in raw chopped garlic. Adjust quantity to preference.
– Common mistakes: Over-flouring while kneading yields heavy bread—add flour in small increments. Overproofing yields flat loaves; watch the dough, not the clock.
– Visual cues: Look for a golden-brown crust and a toasted parmesan top; if the top browns too fast, tent with foil for remaining bake time.
Storage & Freezing for Garlic Parmesan Herb Bread
Room temperature storage: Keep the cooled loaf in a paper bag or wrapped in a clean kitchen towel for up to 2 days to preserve crust texture. For softer crust, use a loosely sealed plastic bag but expect the crust to soften.
Fridge storage: Store sliced bread in an airtight container in the refrigerator for up to 5 days; refrigeration can dry bread, so reheat slices in a hot oven or toaster.
Freezer storage: Slice the cooled loaf and place slices in a single layer on a baking sheet to flash-freeze for 30 minutes, then transfer to a freezer-safe zip bag or airtight container for up to 3 months. Wrap whole loaves tightly in plastic wrap followed by foil if freezing whole.
Thawing and reheating: Thaw slices at room temperature or toast directly from frozen. For whole loaves, unwrap and bake at 300°F (150°C) for 10–15 minutes to refresh crust and interior moisture.
Variations & Substitutions for Garlic Parmesan Herb Bread
Garlic-Roasted Twist: Roast the garlic before folding it into the dough and reduce raw garlic to one clove for a mellow, caramelized flavor. The loaf will be sweeter and less sharp, with buttery garlic pockets.
Cheesy Herb Pull-Apart: Increase parmesan to ½ cup and layer the dough with thin sheets of butter and cheese, then slice and stack into a loaf tin. This yields a pull-apart, layered texture ideal for sharing.
Olive & Sun-Dried Tomato: Fold in ⅓ cup chopped sun-dried tomatoes and ½ cup chopped olives, reduce rosemary to 1 teaspoon. Expect a Mediterranean-savory loaf with salty, tangy bites.
Whole Wheat Swap: Replace half the all-purpose flour with whole wheat flour and add a tablespoon of honey for moisture. The loaf will be denser, nuttier, and more filling—allow slightly longer rising time.
Frequently Asked Questions About Garlic Parmesan Herb Bread
Q: Can I make this bread without a stand mixer?
A: Yes. Kneading by hand for 6–10 minutes works well. Use the palm of your hand to stretch and fold the dough repeatedly; it will feel smoother and more elastic as gluten forms. Hand-kneaded dough often yields excellent texture but requires slightly more time and effort.
Q: How do I know if my yeast is still good?
A: Proof yeast by mixing it with warm water and a pinch of sugar—fresh yeast will foam and bubble within 5–10 minutes. Instant yeast can be mixed directly into dry ingredients, but if there is no rise after combining and proofing, try a new packet.
Q: Why is my bread dense or heavy?
A: Dense bread usually means under-kneaded dough, too much flour, or insufficient rise time. Ensure you develop gluten with proper kneading, add flour sparingly, and let the dough double in a warm spot before shaping.
Q: Can I use fresh herbs instead of dried?
A: Yes—use three times the amount of fresh herbs by volume vs. dried (e.g., 6 teaspoons fresh for 2 teaspoons dried rosemary). Fresh herbs add brightness; add them during mixing so they disperse evenly.
Q: How can I get a crispier crust?
A: Bake on a preheated baking stone or heavy baking sheet and introduce steam in the first 5–10 minutes by placing a small oven-safe pan of boiling water on the bottom shelf or spraying the oven walls with water. A higher oven temperature for the first few minutes can also help the crust blister and crisp.
Final Thoughts on Garlic Parmesan Herb Bread
This Garlic Parmesan Herb Bread is an easy, flavorful loaf that elevates any meal with minimal fuss. Try the variations and leave a rating to help other bakers find their favorite version.
Please leave a star rating in the recipe card below and pin this to Pinterest if you loved it.
Conclusion: Garlic Parmesan Herb Bread
For a rustic take with extra parmesan and herbs, see this similar Rustic Garlic Parmesan Herb Bread for inspiration: Rustic Garlic Parmesan Herb Bread – The Stay At Home Chef.
If you want a pull-apart version stuffed with roasted pockets of cheese, this Roasted Garlic Parmesan Herb Pull Apart Bread demonstrates the technique well: Roasted Garlic Parmesan Herb Pull Apart Bread – How Sweet Eats.
To explore a beer-bread twist that shortens the rise while adding depth, check this Garlic, Parmesan, and Herb Beer Bread recipe: Garlic, Parmesan, and Herb Beer Bread – Food52.
Garlic Parmesan Herb Bread
Ingredients
Method
- Stir the warm water, sugar, and instant yeast in a large bowl until dissolved. Let sit briefly if using active dry yeast to ensure it bubbles; with instant yeast you can combine immediately with dry ingredients. Add salt, dried basil, oregano, rosemary, chopped garlic, and about half the parmesan, then stir in 2 cups of flour to make a shaggy dough.
- Turn the dough out onto a lightly floured surface and knead 6–8 minutes by hand, or 4–6 minutes in a stand mixer with a dough hook, until smooth and elastic.
- Punch down the risen dough, shape it into a round or oval loaf, and set it on an oiled baking sheet. Brush the top lightly with melted butter and sprinkle remaining parmesan across the surface. Cover loosely and let proof a second time for 20–30 minutes.
- Preheat your oven to 400°F (205°C). Bake the loaf for 20–25 minutes until deep golden brown and the internal temperature reaches about 200°F (93°C). Brush with remaining melted butter after removing from the oven.