
I still remember the first time I baked this apple pie: the kitchen smelled like warm cinnamon and butter for hours, and the crust flaked away just right. This is a classic double‑crust apple pie—simple pantry staples, tender spiced apples, and a buttery, flaky crust that’s worth the little bit of patience it asks for. It’s the kind of dessert you make for Sunday supper, holiday gatherings, or whenever you want a comforting, timeless treat. If you’re planning a dessert spread, this pie pairs beautifully with lighter sweets like a creamy no‑bake pistachio pie for variety.
Why you’ll love this dish
This apple pie balances nostalgia and technique. You get:
- A tender, flaky crust from chilled butter and minimal handling.
- Apple slices that stay slightly crisp instead of turning to mush.
- Simple ingredients you probably already have at home.
It’s perfect for holidays, potlucks, or a cosy weeknight dessert when you want something homemade without complicated steps. The recipe scales easily—double it for two pies at once—or swap in different apples to tune the sweetness and texture.
“The crust baked up golden, the filling was bubbly and spiced just right—everyone asked for seconds.” — a regular at my Sunday dinner table
If you want a complementary dessert for kids or picky eaters on the same table, try a bright, fun option like the carrot‑pineapple walnut cake.
Step-by-step overview
Before you dive in, here’s the process at a glance:
- Make a straightforward double‑crust pastry and chill it until firm.
- Peel and slice apples; toss with sugar, cinnamon, nutmeg, and lemon.
- Roll one disk of dough into your pie plate, pile in the apples, then top with the second disk.
- Bake hot at first to set the crust, then finish at a lower temperature until the filling bubbles and the crust is golden.
If you’re baking with kids or want a quick distraction while the dough chills, consider a simple no‑bake project like these playful circus animal cookie Rice Krispie treats to keep them busy.
What you’ll need
- 2 1/2 cups all‑purpose flour
- 1 tsp salt
- 1 tsp sugar
- 1 cup unsalted butter, chilled and diced (use shortening for a less buttery but flakier crust)
- 6 to 8 tablespoons ice water
- 6 to 8 apples, peeled and sliced (see FAQs for best varieties)
- 3/4 cup sugar
- 2 tsp ground cinnamon
- 1/4 tsp nutmeg
- 2 tbsp lemon juice
- 2 tbsp butter, cut into small pieces to dot the filling
Notes on ingredients and substitutions:
- For a slightly firmer filling, toss the apples with 1 tbsp cornstarch.
- Use cold, unsalted butter for predictable salt control; if using salted butter, reduce added salt slightly.
- Try a mix of tart and sweet apples (e.g., Granny Smith + Honeycrisp). For a kid‑friendly twist, serve with fruit‑forward sides like those Easter-themed treats such as Easter egg Rice Krispie treats.
Step-by-step instructions
- Preheat the oven to 425°F (220°C).
- In a large bowl, whisk together 2 1/2 cups flour, 1 tsp salt, and 1 tsp sugar.
- Add 1 cup chilled, diced butter. Use a pastry cutter or your fingertips to cut the butter into the flour until the mixture looks like coarse crumbs with pea‑sized bits.
- Sprinkle 6–8 tablespoons ice water over the mixture a tablespoon at a time. Toss gently until a dough forms that holds together when pressed. Do not overwork.
- Divide the dough into two disks. Wrap each in plastic and refrigerate for at least 4 hours or overnight. Chilling firms the butter and hydrates the flour—both give you flakier layers.
- Roll out one disk on a lightly floured surface to fit a 9‑inch pie plate. Ease it into the plate without stretching.
- Toss 6–8 peeled, sliced apples with 3/4 cup sugar, 2 tsp cinnamon, 1/4 tsp nutmeg, and 2 tbsp lemon juice. Mound the apples into the crust and dot with 2 tbsp butter.
- Roll out the second disk and place it over the filling. Trim edges, crimp to seal, and cut slits in the top to vent steam. Brush with an egg wash if you like a glossy finish and sprinkle a little sugar.
- Bake at 425°F for 15 minutes to set the crust. Reduce the oven to 350°F (175°C) and bake another 35–45 minutes until the filling is bubbly and the crust is golden brown. If the edges brown too quickly, shield them with foil.
- Let the pie cool for at least 2 hours so the filling sets and slices cleanly. While the dough chills, you can entertain little helpers with quick projects like Easter Rice Krispie treats.
Best ways to enjoy it
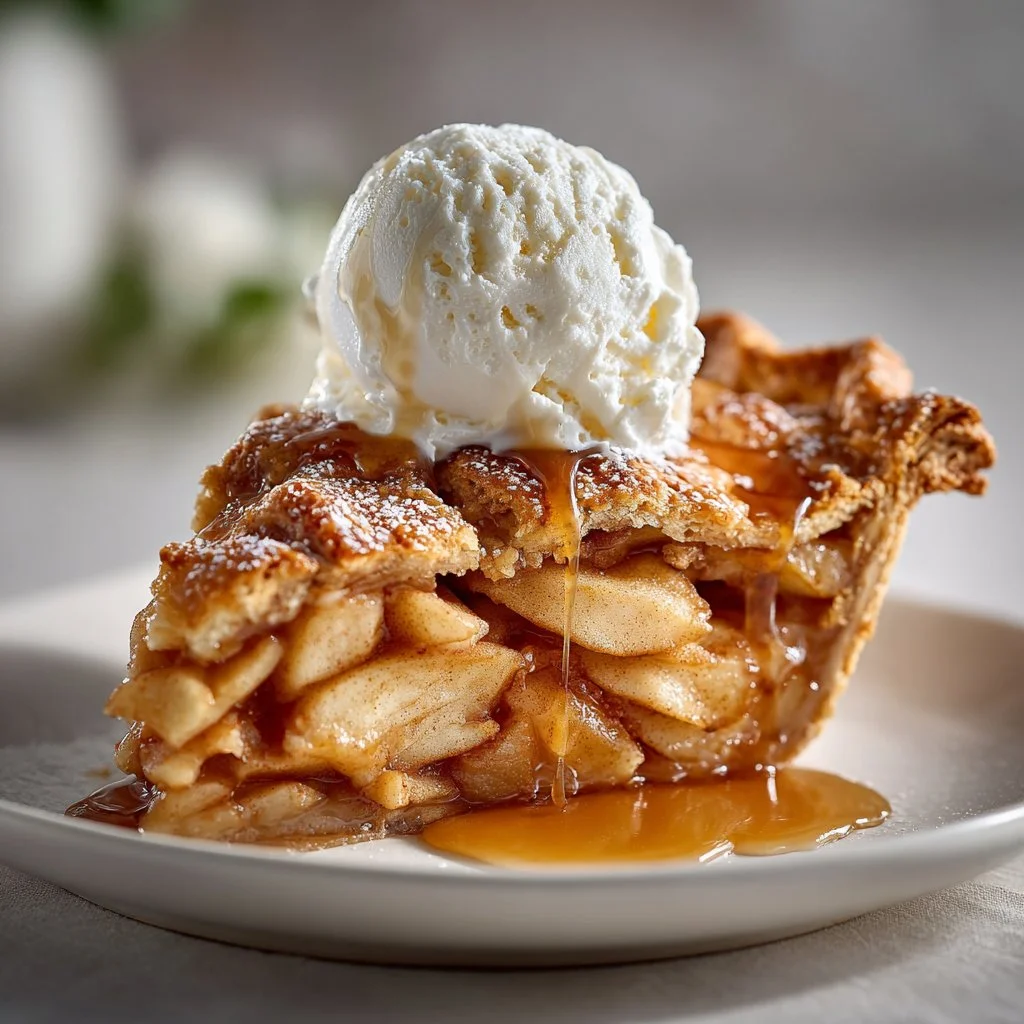
- Serve warm with a scoop of vanilla ice cream for the classic experience.
- For a savory contrast, try a thin slice of sharp cheddar cheese on top—New England tradition.
- Plate a slice with a drizzle of salted caramel or a dollop of whipped cream.
- Pair with hot tea, strong coffee, or a chilled glass of hard cider for adult gatherings.
Storage and reheating tips
- Room temperature: A baked pie can safely sit covered on the counter for up to 2 days.
- Refrigerator: Store covered for 3–4 days for best quality. Refrigeration keeps the filling from fermenting if your kitchen is warm.
- Freezing: To freeze, wrap the cooled whole pie or individual slices tightly in plastic and foil; freeze up to 3–4 months. Thaw overnight in the refrigerator.
- Reheating: Warm slices in a 350°F oven for about 10–15 minutes or microwave individual slices for 20–30 seconds. For a crisp crust, reheat in a toaster oven or oven rather than the microwave.
- Food safety: Don’t leave the pie out at room temperature for more than 2 hours, especially if the kitchen is warm.
Helpful cooking tips
- Keep everything cold: Cold butter and cold water give the crust pockets of steam that create flakiness. Chill the dough thoroughly.
- Don’t overwork the dough: Handle it just enough to bring it together. Overkneading develops gluten and makes the crust tough.
- Even apple slices = even cooking: Slice apples uniformly so they cook at the same rate. A mandoline or sharp knife helps.
- Prevent a soggy bottom: Toss apples with a little cornstarch or flour and preheat the pie plate if you have a pizza stone or baking steel to transfer heat quickly.
- Watch the bake time: If the top browns too quickly, tent with foil. Look for bubbling filling along the slits as your cue that it’s done.
Creative twists
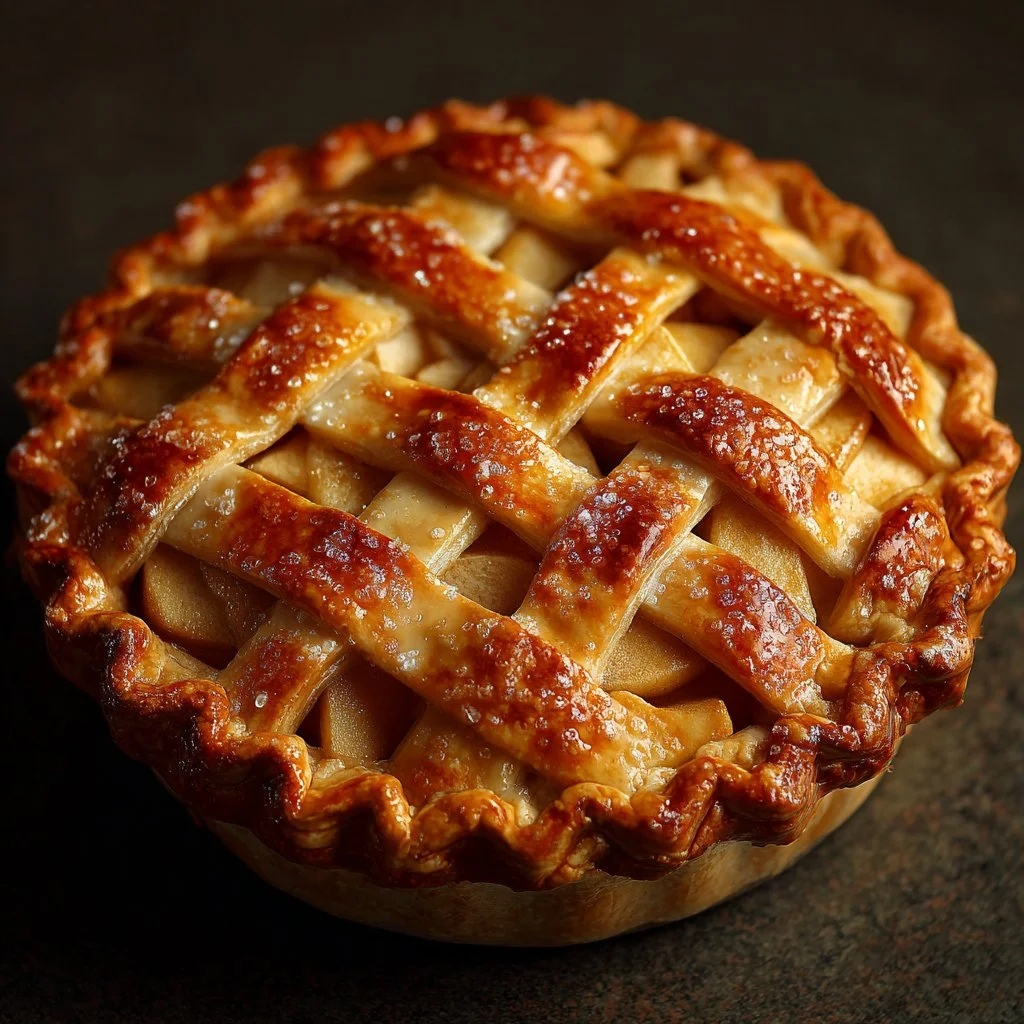
- Lattice top with turbinado sugar for a pretty, crunchy finish.
- Add a streusel topping (brown sugar, oats, butter) in place of the top crust for a crumble pie.
- Caramel apple pie: toss apples with 2–3 tbsp caramel sauce before filling.
- Gluten‑free: swap in a gluten‑free flour blend and add a touch more water if needed.
- Vegan: use chilled coconut oil or vegan buttery spread and skip the egg wash.
Helpful answers
Q: How long does this apple pie take to make from start to finish?
A: Active prep is about 45–60 minutes (including rolling), but you must chill the dough at least 4 hours—overnight is ideal. Total time with chilling and baking is around 6 hours, mostly hands‑off.
Q: What apples are best for pie?
A: A mix is best—tart Granny Smith plus a sweeter, firmer apple like Honeycrisp or Braeburn gives great texture and balanced flavor. Avoid very soft apples that turn to mush.
Q: Can I freeze the pie before baking?
A: Yes. Assemble the pie, wrap tightly, and freeze unbaked. Bake from frozen at 425°F for about 20 minutes, then reduce to 350°F and bake until bubbly and golden (may take longer than a fresh pie).
Q: My crust came out tough — what went wrong?
A: Tough crust usually means the dough was overworked or the butter melted before baking. Chill the dough, handle it minimally, and work quickly with cold ingredients.
Q: How can I prevent the filling from leaking?
A: Don’t overfill the pie. Cut vents in the top crust and ensure the edges are well sealed. A thicker filling (add 1 tbsp cornstarch) also helps.
Conclusion
If you’d like another classic take on apple pie techniques, this Little Spoon Farm apple pie tutorial walks through every step. For a highly rated, stepwise recipe to compare methods, see Natasha’s Kitchen’s apple pie. And for a tried‑and‑true family recipe with helpful reader notes, check out Grandma Ople’s apple pie on Allrecipes.
Double-Crust Apple Pie
Ingredients
Method
- Preheat the oven to 425°F (220°C).
- In a large bowl, whisk together the flour, salt, and sugar.
- Add the chilled, diced butter and cut it into the flour until the mixture looks like coarse crumbs.
- Sprinkle ice water over the mixture gradually, tossing gently until a dough forms.
- Divide the dough into two disks, wrap in plastic, and refrigerate for at least 4 hours.
- Roll out one disk on a floured surface to fit a 9-inch pie plate and ease the dough into the plate.
- In a bowl, toss the sliced apples with sugar, cinnamon, nutmeg, and lemon juice.
- Mound the apple mixture into the crust and dot with butter.
- Roll out the second disk, place over the filling, trim edges, crimp to seal, and vent the top.
- Bake at 425°F for 15 minutes, then reduce to 350°F (175°C) and bake for 35–45 minutes until bubbly and golden.
- Let the pie cool for at least 2 hours before slicing.