
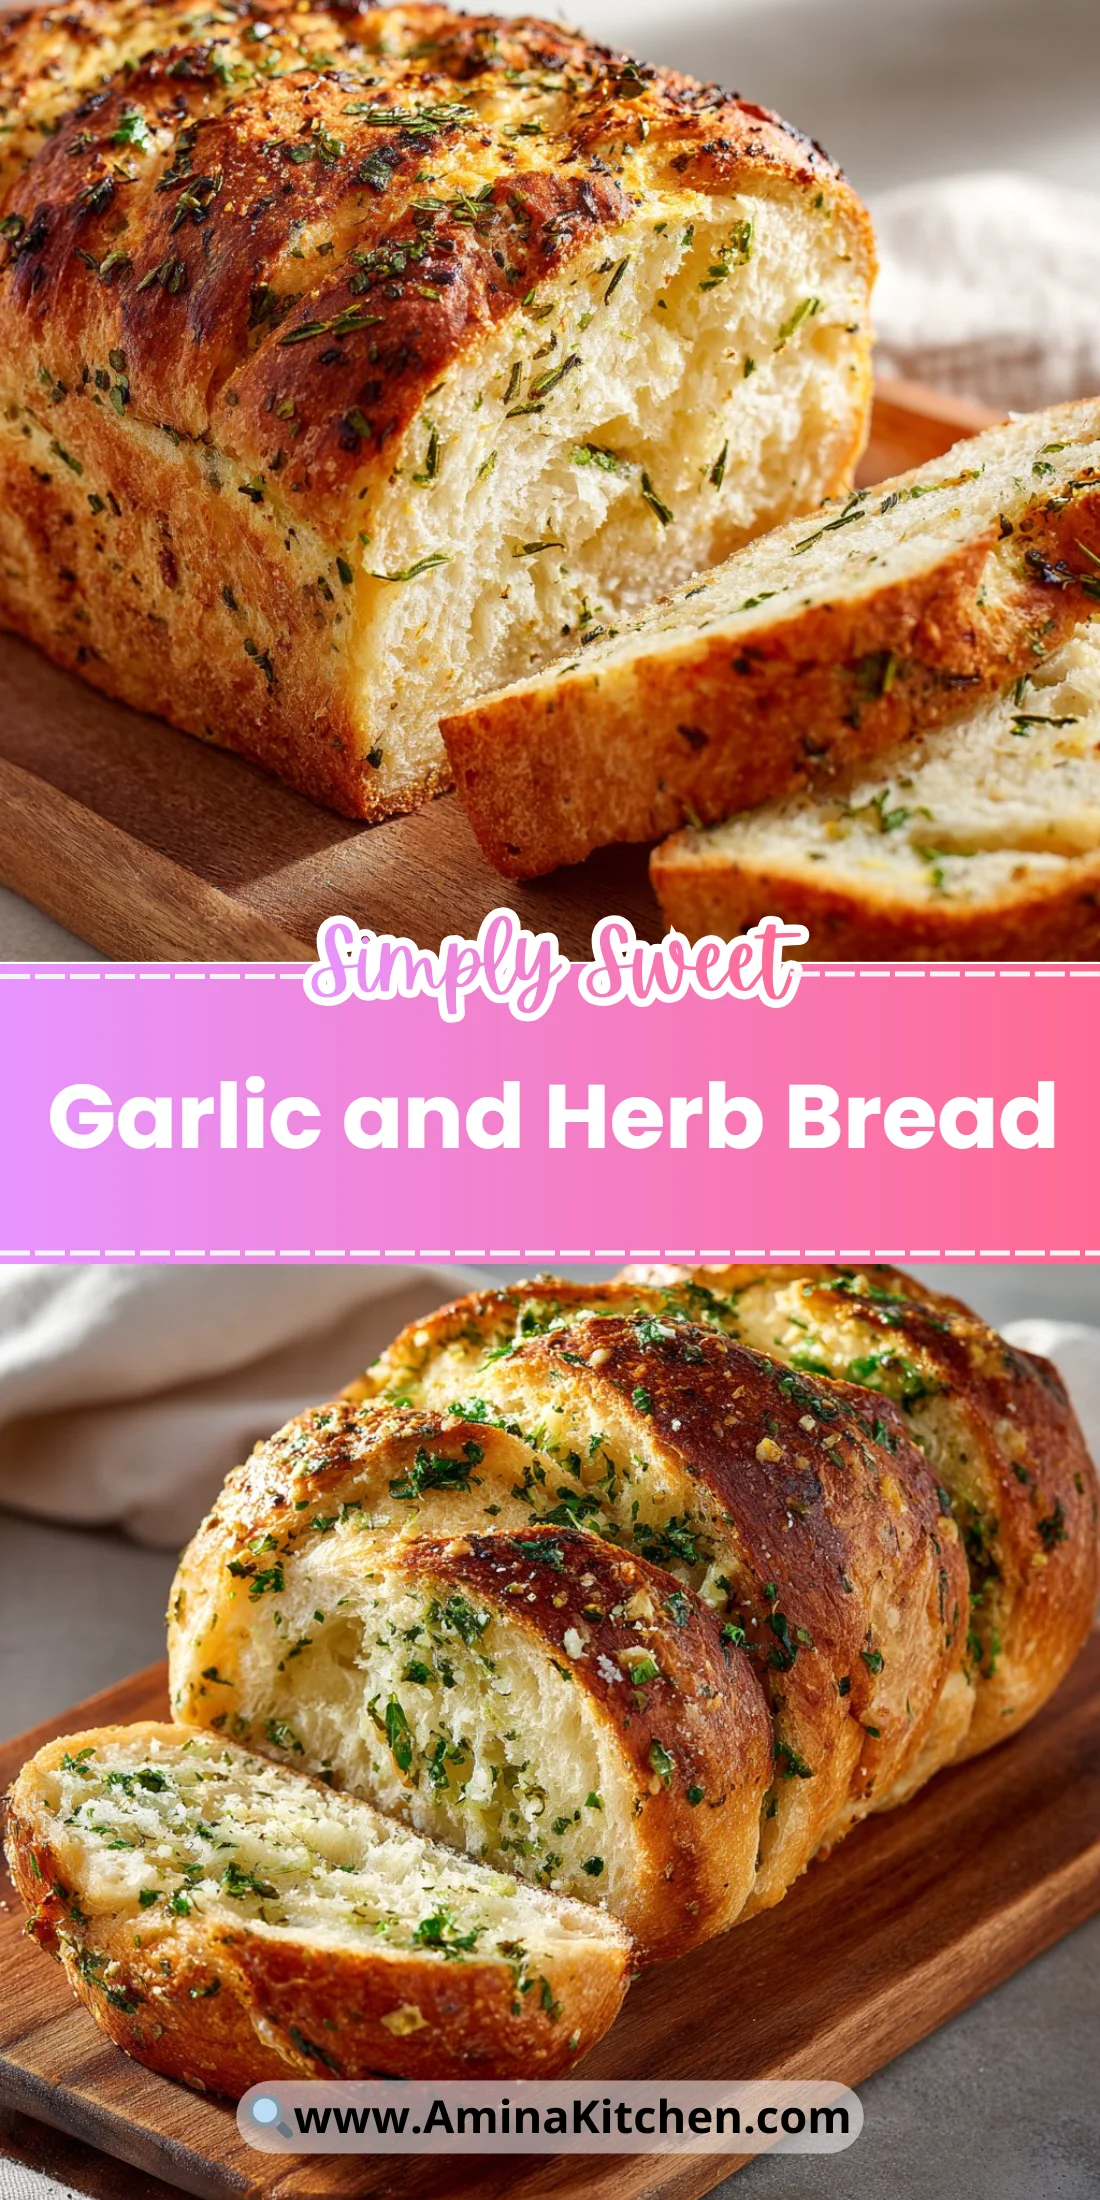
Fresh from the oven, this loaf fills the kitchen with warm garlic and herb aroma that gets everyone to the table fast.
Soft, slightly chewy crumb, a crisp golden exterior, and pockets of gooey cheese make it an easy favorite for weeknights or company.
Totally doable on a weeknight and endlessly tweakable, this recipe plays well with simple sides and big flavor swaps.
If you love quick, rustic bakes, you might also enjoy my Irish soda bread recipe for another fast, comforting loaf.
Why You’ll Love This Garlic and Herb Bread
- Quick to make with basic pantry staples.
- Bursting with fresh herb flavor and roasted garlic aroma.
- Crispy crust with a tender, cheesy interior.
- Versatile: pairs with soups, salads, or serves as a snack.
- Family-friendly — kids love the gooey cheese pockets.
- Minimal equipment: bowl, spatula, and a baking tray.
This Garlic and Herb Bread tastes garlicky and herb-forward without being overpowering. The crust is crisp and browned, while the inside stays moist and elastic thanks to a balanced flour-water ratio and a touch of olive oil.
"Five stars — this loaf vanished in a single dinner. Crispy outside, tender inside, and the herbs came through beautifully." — A satisfied reader
Key Ingredients for Garlic and Herb Bread
Flour (4 cups plain all-purpose flour)
All-purpose flour provides the protein needed for gluten development without being as chewy as bread flour. Buy a fresh bag from a reputable brand for consistent results and weigh if you can; scooping can compact flour and lead to a dense loaf. If you substitute with bread flour you’ll get more chew and higher rise; use a little less water to compensate.
Active dry yeast (1 packet, ~2¼ teaspoons)
Active dry yeast is the engine for rise and crumb structure. Look for recent expiration dates and store unopened packets in a cool, dry place; refrigerate after opening. If you switch to instant yeast, reduce proofing time slightly and add it directly to the dry mix.
Garlic (4 cloves, minced)
Fresh garlic gives bright, aromatic flavor that dried granules can’t match. Choose firm, plump bulbs with no soft spots for the freshest taste. If you substitute garlic powder, use much less and expect a less fresh, slightly one-note flavor.
Mixed fresh herbs (0.5 cups, mostly parsley with a little thyme)
Fresh herbs add lift and green flavor; parsley gives freshness while thyme adds earthiness. Buy herbs that are vibrant and not wilted; wash and dry them thoroughly to avoid extra moisture. If using dried herbs, reduce quantities by about one-third and expect a more concentrated but less lively herb flavor.
Full Ingredient List for Garlic and Herb Bread
- 4 cups plain all-purpose flour (Weighed when precise counts mattered.)
- 1.5 cups warm water (Heated to 100–110°F.)
- 1 packet active dry yeast (Approximately 2¼ teaspoons.)
- 1 small spoon salt
- 2 tablespoons olive oil (For richness.)
- 4 cloves garlic, minced (Until fragrant.)
- 0.5 cups mixed fresh herbs, chopped (Mostly parsley with a little thyme.)
- 1 cup shredded cheese (Split between mozzarella and sharp cheddar.)
Step-by-Step Instructions for Garlic and Herb Bread
Step 1: Kneading and Timing
Combine warm water and yeast in a bowl and let sit until foamy, about 5–10 minutes. Stir in olive oil, then add the flour and salt and mix until a shaggy dough forms. Turn onto a lightly floured surface and knead for 6–8 minutes until smooth and elastic, or use a stand mixer for 4–5 minutes on low.
Pro Tip: The dough should be slightly tacky but not sticky; when pressed it will slowly spring back.
Step 2: Filling and Shaping
Flatten the dough into a rough rectangle and sprinkle the garlic, herbs, and half the cheese evenly over the surface. Fold the dough over the filling, gently press to seal, and roll or shape into a loaf or braid as you prefer. Let the shaped loaf proof on a baking sheet for 30–45 minutes until puffy and noticeably larger.
Pro Tip: The surface should look puffy and feel light when gently tapped — if it deflates easily it’s over-proofed.
Step 3: Baking
Preheat the oven to 400°F (200°C). Brush the loaf with a little olive oil, sprinkle the remaining cheese on top, and bake for 20–28 minutes until the crust is deep golden brown and the cheese is bubbly. Cool briefly before slicing so the interior sets.
Pro Tip: The crust should be deeply golden and the bottom will sound hollow when tapped.

Expert Tips for Garlic and Herb Bread
- Temperature tips: Keep water between 100–110°F for ideal yeast activation; cooler water slows rise, hotter kills yeast.
- Dough feel: Aim for a slightly tacky dough; too dry -> dense loaf, too wet -> sticky and hard to shape.
- Proofing visual: Dough should expand by about 50% and hold an indentation when gently pressed.
- Cheese placement: Adding some cheese inside and some on top ensures melty pockets plus a golden cheesy crust.
- Equipment tips: Use a baking stone for extra bottom crust crispness or a sheet pan lined with parchment for easy cleanup.
- Texture troubleshooting: If the crumb is gummy, the loaf may be underbaked or too hydrated; bake a few extra minutes and lower oven moisture.
- Common mistakes: Overworking the dough tears the gluten network; under-kneading prevents proper rise.
- Flavor layering: Lightly roast minced garlic before adding if you prefer a milder, sweet garlic note rather than raw sharpness.
Storage & Freezing for Garlic and Herb Bread
Fridge storage: Store leftover slices in an airtight container or zip-top bag for up to 3 days. Avoid refrigeration for whole loaves longer than 24 hours since staling accelerates in the fridge.
Freezer storage: Wrap cooled whole loaf or individual slices tightly in plastic wrap, then place in a freezer bag or airtight container for up to 3 months. Double wrapping prevents freezer burn and preserves aroma.
Thawing: Thaw slices at room temperature for about 30–60 minutes, or reheat directly from frozen at 350°F for 8–12 minutes. Whole loaves thaw in 2–3 hours at room temperature.
Reheating: For best texture, refresh slices in a 375°F oven for 6–10 minutes until the crust crisps and cheese remelts. Avoid microwaving unless you plan to crisp briefly under a broiler afterward.
You can also compare quick reheating strategies with different recipes like the 3-ingredient green grape and kale smoothie for a quick breakfast pairing.
Variations & Substitutions for Garlic and Herb Bread
Cheesy Jalapeño Garlic and Herb Bread
Add 1–2 diced jalapeños and swap half the cheese for pepper jack. The result is spicy, melty pockets and a lively contrast to the herbs.
Rosemary and Sea Salt version
Replace parsley and thyme with 2 tablespoons chopped fresh rosemary and sprinkle coarse sea salt on top before baking. Expect an aromatic, savory loaf with a crunchy salt finish.
Olive and Sundried Tomato
Fold in 1/2 cup chopped olives and 1/3 cup chopped sundried tomatoes; reduce added salt. This makes the bread Mediterranean-style, perfect for sandwiches or as a tapas side.
Whole Wheat Twist
Swap 1–2 cups of the all-purpose flour for whole wheat flour and add an extra 1–2 tablespoons of water. You’ll get nuttier flavor and a slightly denser crumb with added fiber.
Frequently Asked Questions About Garlic and Herb Bread
Q1: How do I know if my yeast is active?
A1: Proof yeast by mixing it with warm water (100–110°F) and a pinch of sugar. Within 5–10 minutes it should foam and smell slightly yeasty. No foam usually means the yeast is old or the water was too hot or cold; replace the yeast and try again.
Q2: Can I make this bread without kneading?
A2: Yes — use a no-knead approach by mixing the dough until combined and letting it rest 12–18 hours for gluten development. The long ferment builds structure slowly, producing a rustic crumb though the timing and texture will differ from the quick-knead version.
Q3: Why did my bread come out dense?
A3: Dense bread typically results from too much flour, insufficient water, under-proofing, or expired yeast. Weighing flour helps; also ensure the dough has time to rise and is kneaded enough to develop elasticity.
Q4: Can I use pre-minced jarred garlic instead of fresh?
A4: You can, but jarred garlic is more concentrated and slightly different in flavor. Use about half the amount and taste the dough if possible; roast or briefly cook jarred garlic to mellow its sharper notes.
Q5: How do I get a really crispy crust?
A5: Bake on a preheated baking stone or place a shallow pan of hot water in the oven to create steam for the first 8–10 minutes. Also brush the loaf with oil and finish with a quick blast of high heat or broil for 1–2 minutes, watching carefully to avoid burning.
Final Thoughts on Garlic and Herb Bread (Conclusion)
If this Garlic and Herb Bread becomes your new weeknight staple, I’d love to hear about it — please leave a star rating in the recipe card below and pin this loaf to Pinterest. For more inspiration, check a creative take like Swirled Garlic Herb Bread, a simple loaf technique at Garlic Herb Bread | Woman Scribbles, and a great Dutch oven approach in Dutch Oven Garlic and Herb Bread – Two Cups Flour.

Garlic and Herb Bread
Ingredients
Method
- Combine warm water and yeast in a bowl and let sit until foamy, about 5–10 minutes.
- Stir in olive oil, then add the flour and salt, mixing until a shaggy dough forms.
- Turn onto a lightly floured surface and knead for 6–8 minutes until smooth and elastic, or use a stand mixer for 4–5 minutes on low.
- The dough should be slightly tacky but not sticky; when pressed, it will slowly spring back.
- Flatten the dough into a rough rectangle and sprinkle the garlic, herbs, and half the cheese evenly over the surface.
- Fold the dough over the filling, gently press to seal, and roll or shape into a loaf or braid as preferred.
- Let the shaped loaf proof on a baking sheet for 30–45 minutes until puffy and noticeably larger.
- The surface should look puffy and feel light when gently tapped — if it deflates easily, it’s over-proofed.
- Preheat the oven to 400°F (200°C).
- Brush the loaf with a little olive oil, sprinkle the remaining cheese on top, and bake for 20–28 minutes until the crust is deep golden brown and the cheese is bubbly.
- Cool briefly before slicing so the interior sets.
- The crust should be deeply golden, and the bottom will sound hollow when tapped.