
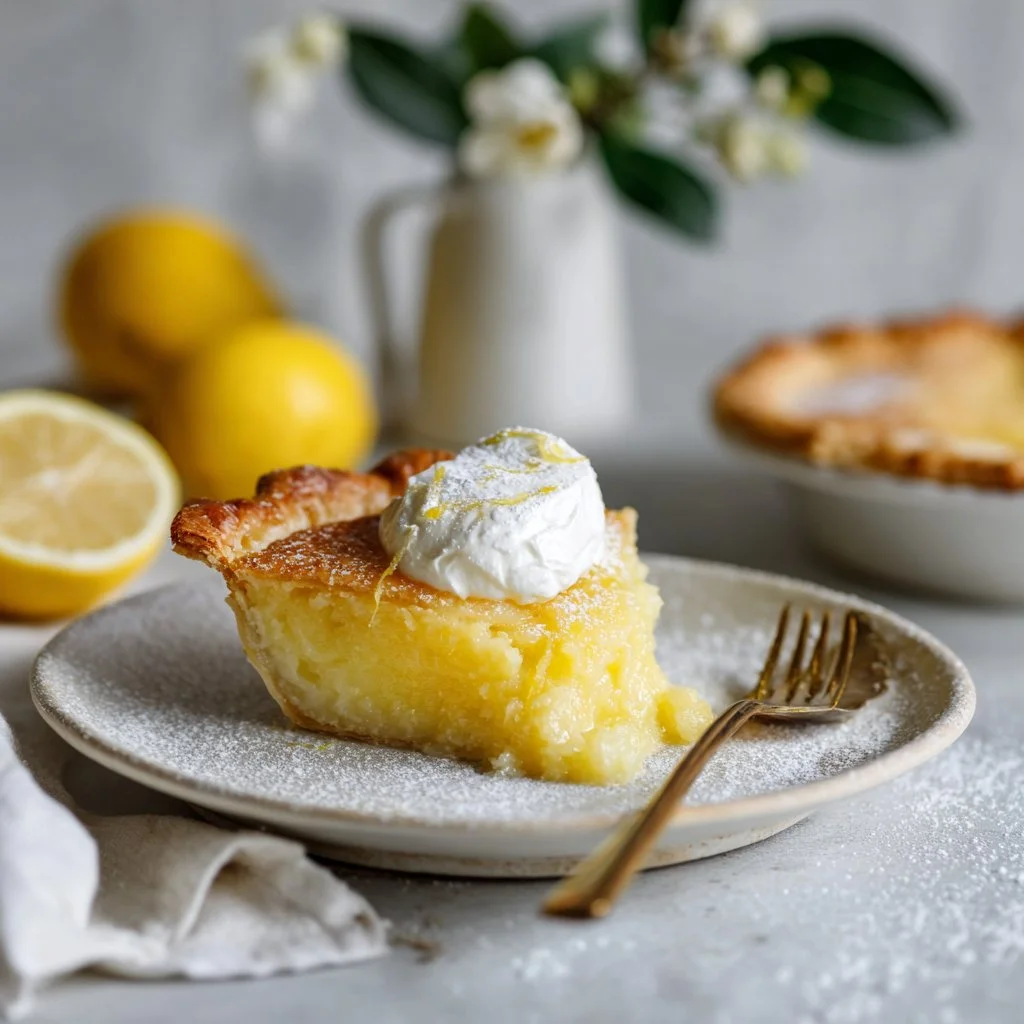
Start with a bright lemony aroma and a flaky crust that snaps when you cut it. This Old Fashioned Lemon Pie is simple, nostalgic, and made from pantry staples.
It takes one stovetop custard technique and a humble double crust to produce a glossy, tang-forward filling with just enough silk from eggs and butter. The result is a classic pie that feels both old-fashioned and fresh.
If you like lemon desserts in unexpected formats, try something complementary like zesty lemon Rice Krispie treats for a playful snack that pairs well with a slice.
Why You’ll Love This Old Fashioned Lemon Pie
- Bright, true lemon flavor without excessive sugar.
- Smooth, clear, custard-like filling that slices clean.
- Flaky double crust for a satisfying textural contrast.
- Fast stovetop cooking—no sous-vide or tempering required.
- Uses common pantry ingredients you probably already have.
- Great make-ahead pie that improves after chilling.
This pie tastes of concentrated lemon — tart with a rounded sweetness — and the texture is glossy and slightly firm, like a set lemon curd inside a crisp double crust. The contrast between the tender, slightly chewy filling and the buttery crust is what keeps people coming back for another forkful.
"This pie tastes exactly like the holiday pies my grandmother made — bright lemon, perfectly set, and that browned top crust is everything. Five stars!" — A satisfied reader
Key Ingredients for Old Fashioned Lemon Pie
Cornstarch
Cornstarch is the thickening backbone for the filling; 1/4 cup creates a clear, glossy set without graininess. Buy a fresh box and avoid clumpy or discolored cornstarch — older starch can lose thickening power. If you substitute flour, expect a cloudy, slightly pasty filling and a denser texture.
Lemon zest + lemon juice
Fresh lemon zest (grated rind) and juice give the pie its essential bright aroma and acid balance; bottled lemon juice won’t replicate the volatile oils in the zest. Choose heavy, fragrant lemons (Meyer lemons can be used for milder sweetness). Using lemon extract instead will taste artificial and lacks the complex citrus oils that create the authentic flavor.
Eggs
Eggs add structure and silkiness; they help the cornstarch set into a custard that slices cleanly. Use large eggs at room temperature so they incorporate evenly and reduce the shock to the hot filling. If you omit eggs, the filling will be less rich and may not set as firmly, relying solely on starch.
Pastry for a double crust (9-inch)
A home-made or store-bought double crust shelters the filling and browns into a classic presentation. Use butter-rich pastry for flaky flavor or a shortening-based crust for extra tenderness. Substituting a single crust will make this more of an open-top tart and could allow more steam to escape, slightly drying the top of the filling.
Full Ingredient List for Old Fashioned Lemon Pie
– 1/4 cup cornstarch
– 1/4 cup of the water (for slurry) plus 1-1/2 cups boiling water
– 1-1/2 cups sugar
– 2 tablespoons grated lemon rind
– 1 tablespoon butter
– 2 eggs, slightly beaten
– 1/4 cup lemon juice (about 2 lemons)
– Pastry for a double crust 9-inch pie
– 1-1/2 to 2 tablespoons shortening, melted
– 1-1/2 to 2 tablespoons milk
– Sprinkling of flour
Step-by-Step Instructions for Old Fashioned Lemon Pie
Step 1: Preheat and prepare
Preheat your oven to 425°F. Fit the bottom crust into a 9-inch pie plate and keep the top crust ready to roll; chilling the pastry briefly helps prevent shrinking during baking.
Pro Tip: The oven should feel hot and brisk; you should hear the top crust sizzle slightly when it goes in.
Step 2: Make the cornstarch slurry
In a saucepan, blend 1/4 cup cornstarch with 1/4 cup of the water until smooth to avoid lumps. This slurry prevents streaks and ensures the cornstarch disperses evenly once the boiling water is added.
Pro Tip: The mixture should look smooth and pale before you add the boiling water — no visible lumps.
Step 3: Add boiling water and cook to clarity
Add 1-1/2 cups boiling water to the slurry and cook over medium heat, stirring constantly until the mixture thickens and becomes clear and glossy. Keep stirring so the starch heats uniformly and does not stick or form strands.
Pro Tip: Look for a glossy, translucent gel that clings to the spoon; it should not be cloudy or grainy.
Step 4: Finish the base filling
Remove from heat and stir in 1-1/2 cups sugar, 2 tablespoons grated lemon rind, and 1 tablespoon butter until melted and evenly incorporated. Allow this mixture to cool to room temperature; hot filling will scramble the eggs in the next step.
Pro Tip: The filling should smell intensely lemony and be warm but not hot to the touch before adding eggs.
Step 5: Temper eggs and lemon juice
Once the base is cool, stir the slightly beaten eggs into the filling, then add 1/4 cup lemon juice and mix until homogeneous. Mix gently but thoroughly to avoid incorporating too much air, which can cause bubbles during baking.
Pro Tip: The mixture should be smooth, slightly thick, and pourable like heavy cream.
Step 6: Assemble the pie
Pour the prepared filling into the unbaked bottom pie shell, then place the top crust over and seal the edges tightly. Crimp or flute the edges for a decorative seal and to keep juices contained.
Pro Tip: The filling will sit about level with the rim; if it looks overly full, there’s a risk of overflow during the first high-heat stage.
Step 7: Top crust finish and venting
Brush the top crust with 1-1/2 to 2 tablespoons melted shortening, then with 1-1/2 to 2 tablespoons milk; lightly sprinkle flour over the entire top crust. Using a sharp knife, cut several vents into the top crust to allow steam to escape and prevent bubbling.
Pro Tip: The top should look evenly brushed and have several neat vents — steam must have clear escape routes.
Step 8: Bake in two stages
Bake for 10 minutes at 425°F to set and brown the top crust, then reduce heat to 375°F and bake for 30 minutes more, until the crust is golden and the filling is set. Monitor the crust color and tent with foil if it browns too quickly.
Pro Tip: The crust should be a deep golden brown and the center of the pie should be slightly jiggly but not liquid.
Step 9: Cool and set
Transfer the pie to a cooling rack for at least 2 hours before serving to allow the filling to fully set and slice cleanly. Chilling helps the cornstarch finish firming and improves slice appearance.
Pro Tip: After cooling, the pie should have a glossy surface and hold a clean edge when sliced.
Expert Tips for Old Fashioned Lemon Pie
– Use room-temperature eggs for smoother incorporation and to reduce the risk of curdling when adding to the warm filling.
– Start with boiling water but cook the starch on medium so the mixture thickens gradually; high heat can scorch and cause a pasty flavor.
– If the filling is grainy, you likely cooked too fast or didn’t dissolve the slurry; strain through a fine mesh before cooling to rescue texture.
– For a perfectly browned top without burning, tent the crust with foil after the first 20 minutes of the second bake.
– Use a heavy-bottomed saucepan to promote even heat distribution and avoid hot spots that can break down the starch.
– Chill the assembled pie for at least 2 hours; slicing while warm will give you messy, runny wedges.
– If your crust shrinks, it was likely overworked or too warm; chill for 20 minutes before blind-baking next time.
– For sharper lemon notes, add an extra teaspoon of finely grated zest but keep total sugar balanced to avoid bitterness.
Storage & Freezing for Old Fashioned Lemon Pie
Refrigerator: Store the pie covered in the fridge for up to 4 days in an airtight pie keeper or wrapped tightly with plastic wrap. This preserves the set texture and keeps the crust from absorbing fridge odors.
Freezer: Freeze slices (not the whole double-crust if you prefer a crisper top) by wrapping each slice in plastic wrap then foil, or place whole pie in an airtight freezer container for up to 2 months. Note that freezing can soften the crust when thawed.
Thawing: Thaw frozen slices overnight in the refrigerator to maintain texture. Avoid microwaving frozen pie to thaw, as the filling can become rubbery.
Reheating: Warm a refrigerated slice at 300°F for 8–10 minutes if you want the crust crisp again; avoid high heat which can cause the filling to weep. A quick 30-second microwave zap will warm a single slice but may soften the crust.
Variations & Substitutions for Old Fashioned Lemon Pie
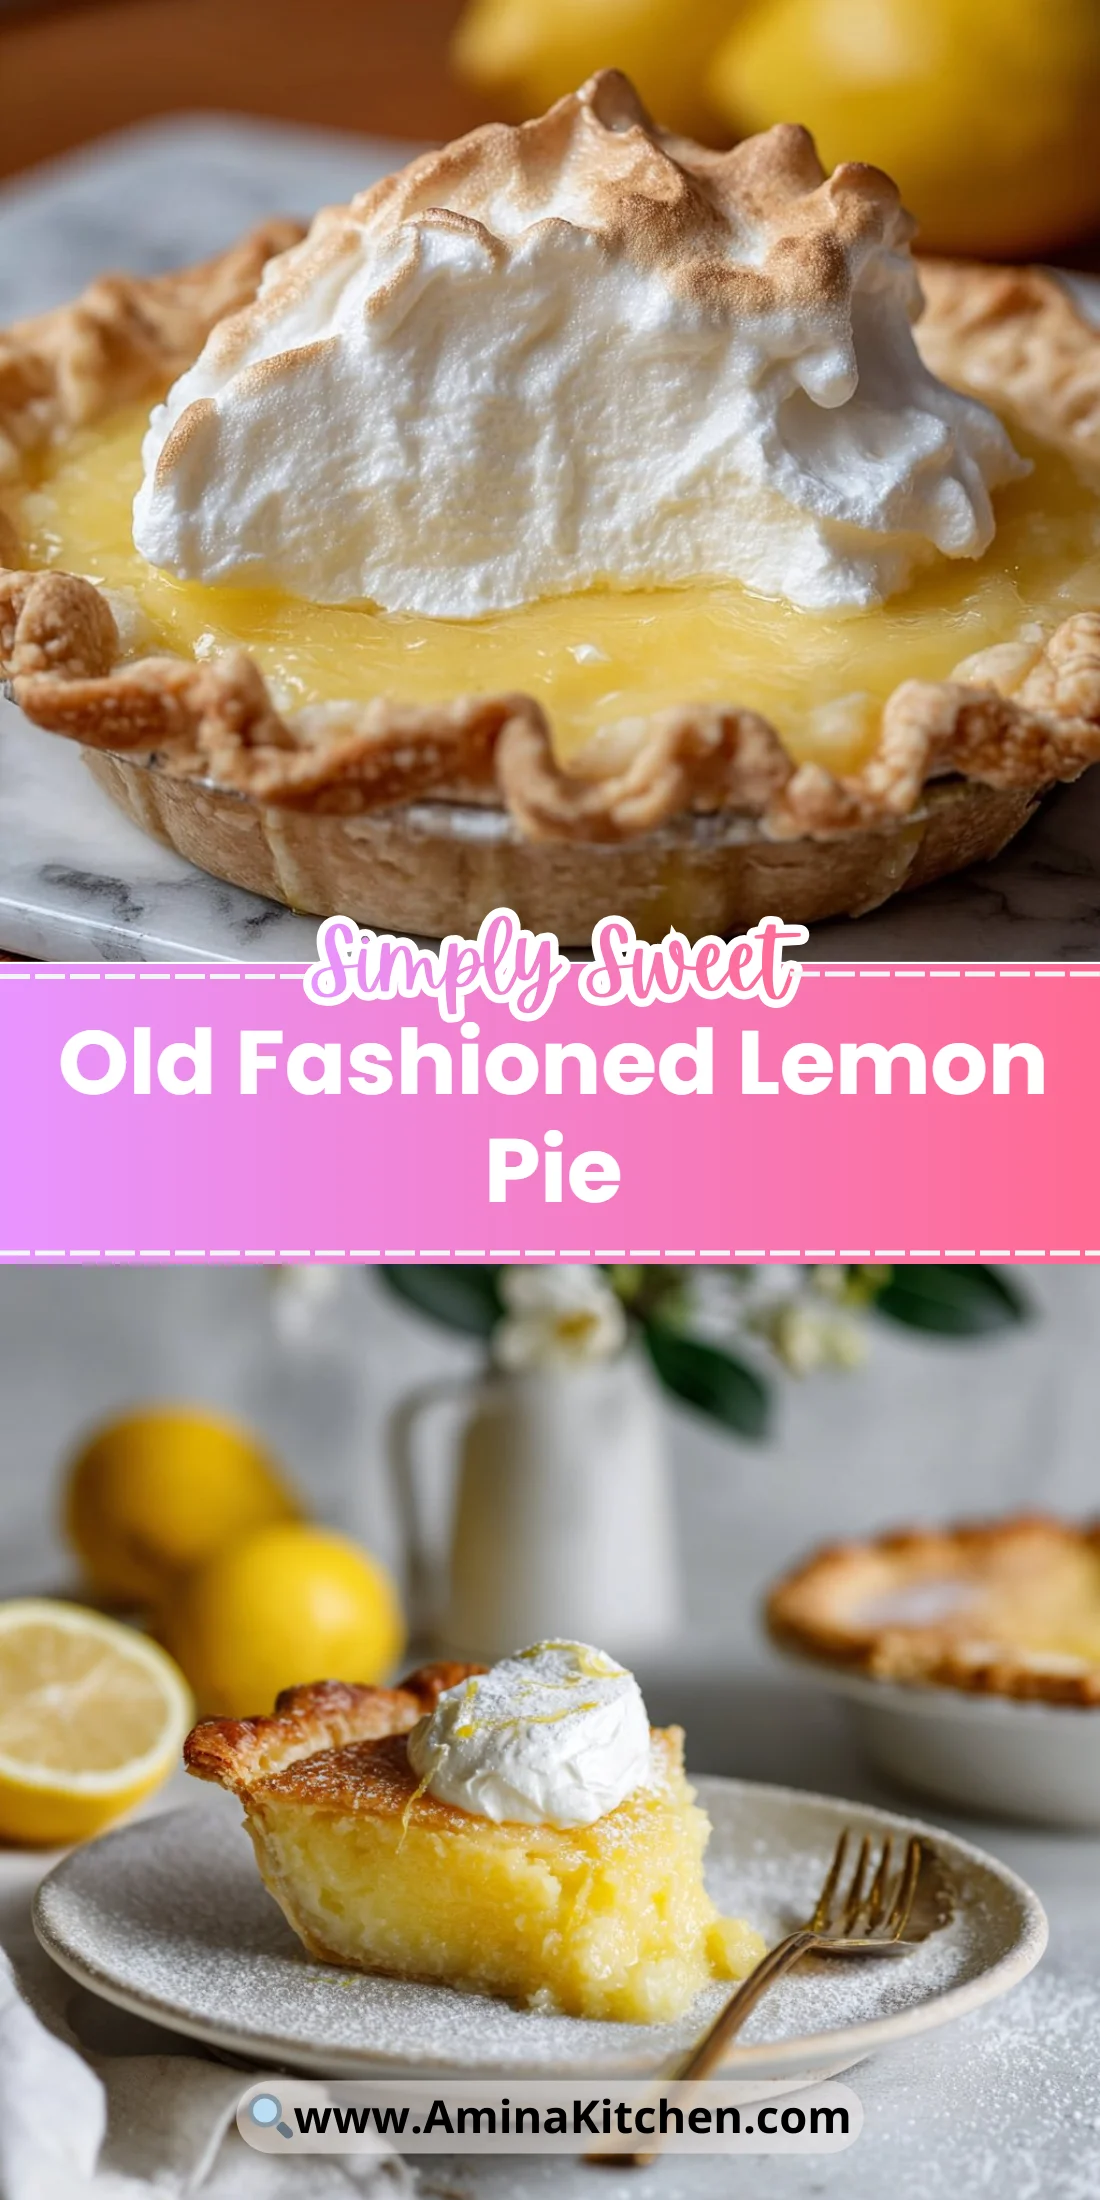
Lemon-Meringue Twist: Omit the top crust and make a billowy meringue (whipped egg whites + sugar) to brown on top. The airy meringue offsets the dense lemon filling and adds a classic presentation.
Lime or Orange Swap: Replace lemon juice and zest with lime or orange for a citrus variation. Lime yields a sharper, tarter profile while orange gives a sweeter, marmalade-like flavor.
Buttery Graham Cracker Crust: Use a graham cracker crust instead of the double crust for a textural change and complementary sweetness. The filling remains the same but the pie becomes more like a tart and needs gentler handling while baking.
Lightened Filling: Reduce sugar by 1/4 cup and add a tablespoon of honey for a subtler sweet note; this slightly alters the set and may yield a tenderer filling, so chill longer before slicing.
Frequently Asked Questions About Old Fashioned Lemon Pie
Q: How do I stop the lemon filling from being grainy?
A: Graininess usually comes from overheating the eggs or cooking the cornstarch too quickly. Cook the cornstarch slurry gently until glossy, cool to room temperature before stirring in the eggs, and keep heat moderate. If the filling is already grainy, strain it through a fine-mesh sieve and chill to improve texture.
Q: Can I make this pie ahead for a party?
A: Yes. Bake the pie and cool it completely, then refrigerate up to 4 days. For the best texture, chill at least 2 hours before serving and bring to just above refrigerator temperature for the best flavor release. If transporting, keep it chilled in a covered pie carrier.
Q: Why did my top crust puff up in the oven?
A: Puffing occurs when steam has no escape. Make sure to cut several vents in the top crust before baking, and seal edges well. If puffs occur, gently press the top down with a spatula after baking and before chilling.
Q: Can I use cornstarch substitutes like arrowroot or flour?
A: Arrowroot can work as a 1:1 substitute for a clearer finish, but it can break down at very high heat and may produce a thinner set. Flour will thicken but create a cloudier, heavier filling and a slightly pasty mouthfeel.
Q: Is there a way to make the filling more tangy without more sugar?
A: Use slightly more lemon zest rather than juice to increase perceived brightness without upping acid that can curdle eggs. You can also add a touch of lemon oil or limoncello for concentrated lemon aroma without extra liquid.
Final Thoughts on Old Fashioned Lemon Pie
This Old Fashioned Lemon Pie is a timeless, pantry-driven dessert with bright flavor and reliable texture. If you enjoyed it, please leave a star rating in the recipe card below and pin this pie to Pinterest for later.
For a classic variant and baking notes, see Kate the Baker’s Old Fashioned Lemon Pie.
If you love lemon pies and meringue, compare techniques in the Classic Lemon Meringue Pie guide.
For a Southern-style perspective and another time-honored recipe, read this Old Fashioned Southern Lemon Meringue Pie.
Old Fashioned Lemon Pie
Ingredients
Method
- Preheat your oven to 425°F. Fit the bottom crust into a 9-inch pie plate and keep the top crust ready to roll; chilling the pastry briefly helps prevent shrinking during baking.
- In a saucepan, blend 1/4 cup cornstarch with 1/4 cup of the water until smooth to avoid lumps.
- Add 1-1/2 cups boiling water to the slurry and cook over medium heat, stirring constantly until the mixture thickens and becomes clear and glossy.
- Remove from heat and stir in 1-1/2 cups sugar, 2 tablespoons grated lemon rind, and 1 tablespoon butter until melted and evenly incorporated. Allow this mixture to cool to room temperature.
- Once the base is cool, stir the slightly beaten eggs into the filling, then add 1/4 cup lemon juice and mix until homogeneous.
- Pour the prepared filling into the unbaked bottom pie shell, then place the top crust over and seal the edges tightly.
- Brush the top crust with melted shortening, then with milk; lightly sprinkle flour over the entire top crust. Cut several vents into the top crust to allow steam to escape.
- Bake for 10 minutes at 425°F to set and brown the top crust, then reduce heat to 375°F and bake for 30 minutes more, until the crust is golden and the filling is set.
- Transfer the pie to a cooling rack for at least 2 hours before serving to allow the filling to fully set.