
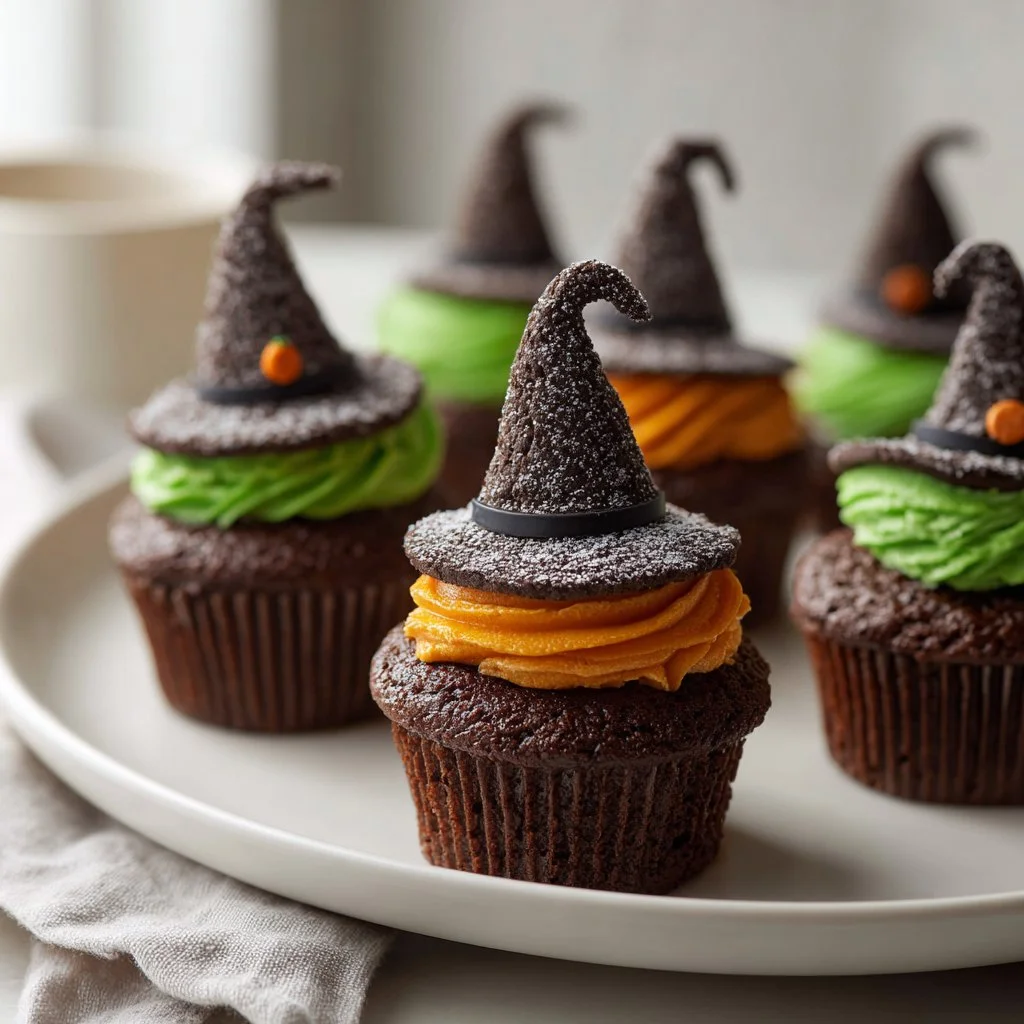
A quick, playful cupcake that turns an ordinary bake into a Halloween hero.
These Witch Hat Chocolate Cupcakes are built from everyday pantry ingredients and a tiny bit of magic — Oreos and Kisses transform a simple swirl of frosting into a whimsical witch’s hat.
They’re perfect for school parties, last-minute hostess gifts, or a cozy baking afternoon with kids.
Keep your oven timer handy and your piping tip clean — these are as fun to make as they are to eat.
Why You’ll Love This Witch Hat Chocolate Cupcakes
– Fast, crowd-pleasing Halloween treat.
– Uses common pantry staples.
– Easy to assemble even for beginners.
– Playful presentation kids love.
– Rich cocoa flavor with a light, fluffy crumb.
– Frosting that pipes well and holds shape.
– No complex candy molds required.
These Witch Hat Chocolate Cupcakes balance a tender, moist chocolate cake with a buttery, stabilized frosting that holds its “hair” shape. The finished cupcake has a soft crumb, a pronounced chocolate note from the cocoa, and a creamy frosting layer that contrasts with the crisp Oreo top and the melty Hershey’s Kiss center.
“Made these for my kid’s class — zero leftover cupcakes and a dozen parents asked for the recipe. Fun, simple, and delicious!” ★★★★★
Key Ingredients for Witch Hat Chocolate Cupcakes
All-purpose flour — 1 cup
All-purpose flour gives structure and tenderness. Choose a well-sifted, all-purpose variety for consistent results. If you substitute with cake flour the cupcakes will be lighter but may collapse more easily; with whole wheat the texture will be denser and nuttier.
Unsweetened cocoa powder — 1/2 cup
Cocoa supplies the deep chocolate flavor and influences batter thickness. Use a good-quality unsweetened cocoa (natural or Dutch-processed affects leavening). If you swap in chocolate drink mix, you’ll add sugar and alter both flavor and texture.
Vegetable oil — 3/4 cup
Oil keeps the crumb moist and extends shelf life; it also gives a tender mouthfeel. Use neutral-flavored vegetable oil or canola; using melted butter will add flavor but firms the crumb and reduces shelf life slightly.
Unsalted butter (softened) — 1 cup (for frosting)
For the frosting, unsalted butter whipped until pale makes a silky, airy base that traps air for a light finish. If salted butter is used, reduce any additional salt in related components. Margarine or butter substitutes will produce a softer, less stable frosting.
Full Ingredient List for Witch Hat Chocolate Cupcakes
– All-purpose flour – 1 cup
– Unsweetened cocoa powder – 1/2 cup
– Baking powder – 1/2 teaspoon
– Salt – 1/2 teaspoon
– Granulated sugar – 1 cup
– Vegetable oil – 3/4 cup
– Large egg – 1
– Milk – 3/4 cup
– Vanilla extract – 1 teaspoon
– Unsalted butter (softened) – 1 cup
– Powdered sugar – 1 3/4 cups
– Heavy whipping cream (optional) – 1 tablespoon
– Gel food coloring – Green and orange
– Oreo Thins – 16
– Hershey’s Kisses – 16
Step-by-Step Instructions for Witch Hat Chocolate Cupcakes
Step 1: Preheat and prepare
Preheat the oven to 350°F and line a muffin tin with 16 cupcake liners. Using liners keeps the cupcakes from sticking and makes assembly simpler.
Pro Tip: The oven should feel evenly warm when you open it; liners should sit snug and flat in the tin.
Step 2: Combine dry ingredients
In a large bowl, whisk together the flour, unsweetened cocoa powder, baking powder, and salt until fully blended and aerated. This ensures even distribution of leavening and avoids lumps of cocoa.
Pro Tip: The dry mix should look uniform and slightly fluffy with no dark cocoa clumps.
Step 3: Mix wet ingredients
In a separate bowl or stand mixer, beat the granulated sugar, vegetable oil, and the large egg on low speed for 1 minute until glossy and slightly thickened. This step starts emulsifying the fat and sugar for good texture.
Pro Tip: The wet mix should look smooth and slightly paler than when you started.
Step 4: Add milk and vanilla
Mix in the milk and vanilla extract until the batter is homogenous. The milk hydrates dry ingredients and the vanilla rounds out chocolate notes.
Pro Tip: The batter should flow slowly off a spoon—viscous but pourable.
Step 5: Combine wet and dry
Slowly add the dry ingredients to the wet, mixing just until the dry streaks disappear. Be careful not to overmix; overworking develops gluten and yields a tougher cupcake.
Pro Tip: When stirred, the batter will show no white streaks and will have a glossy, smooth texture—stop immediately.
Step 6: Fill and bake
Fill each cupcake liner about halfway (1/2 full) and bake for 20–25 minutes until a toothpick inserted in the center comes out with a few moist crumbs. Remove from oven and cool completely on a wire rack.
Pro Tip: Tops should be domed but not cracked; a slight spring-back when touched with a fingertip shows doneness.
Step 7: Make the frosting
For the frosting, whip the softened unsalted butter and vanilla extract for 5–7 minutes until very fluffy and pale. Gradually add the powdered sugar and mix until smooth, adding up to 1 tablespoon heavy cream if you need to loosen the frosting.
Pro Tip: Frosting should be light, ribboning off the beater and holding soft peaks.
Step 8: Color and separate frosting
Reserve a small portion of frosting and tint it orange with gel food coloring. Tint the remaining larger portion green for the witch’s “hair.” Gel colors provide vibrant hues without thinning the frosting.
Pro Tip: The orange portion should be bright but not runny; the green should pipe cleanly, not smear.
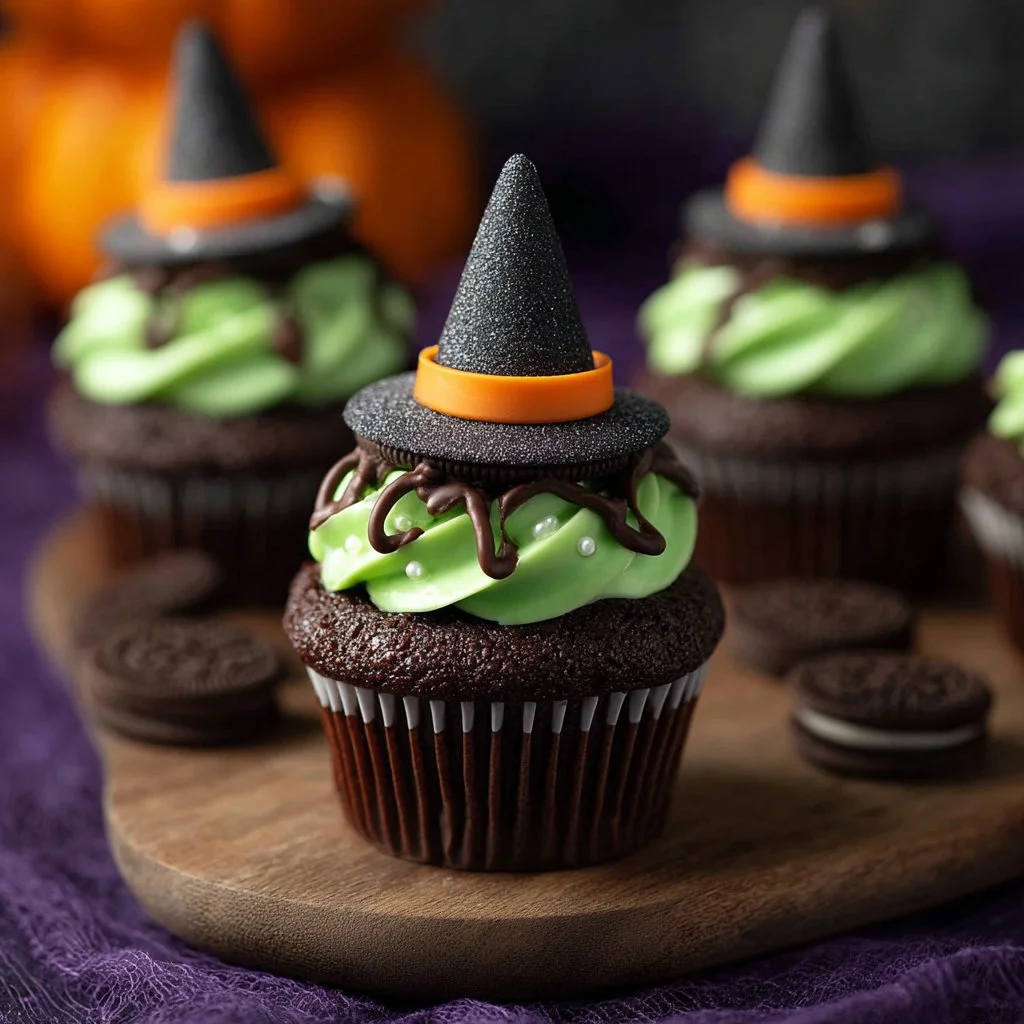
Step 9: Pipe, top, and finish
Pipe the green frosting onto each cooled cupcake in a “hair” pattern. Place an Oreo Thin on top of each swirl. Pipe a small orange ring on the Oreo to mimic hat trim, then press a Hershey’s Kiss into the Oreo center so it looks like the witch’s pointy hat.
Pro Tip: Finished cupcakes should show defined green piping textures, a centered Oreo with an orange ring, and an upright Kiss forming the hat peak.
Expert Tips for Witch Hat Chocolate Cupcakes
– Temperature tip: Use room-temperature eggs and butter for the smoothest emulsion and fullest volume in both batter and frosting.
– Baking tip: Rotate the pan halfway through baking if your oven has hot spots to ensure even domes.
– Texture troubleshooting: If cupcakes are dense, you likely overmixed; mix just until combined next time.
– Frosting stability: Chill frosting for 10 minutes if it feels too soft, then re-whip briefly before piping.
– Equipment tip: Use a medium round piping tip or a star tip for textured “hair” — a stand mixer saves time and yields more consistent frosting.
– Common mistake: Don’t press the Hershey’s Kiss into a warm Oreo; the heat will melt the cream and make the assembly fall apart.
– Visual cue tip: If your green frosting droops after piping, it needs more powdered sugar or chill time for structure.
– Scaling tip: To double the batch, mix in two separate bowls and bake on staggered racks; do not overfill pans.
Storage & Freezing for Witch Hat Chocolate Cupcakes
Store frosted Witch Hat Chocolate Cupcakes in a single layer in an airtight container in the refrigerator for up to 4 days. Refrigeration keeps the frosting firm and the Oreos crisp longer.
To freeze unfrosted cupcakes, cool completely then place in an airtight container or freeze-proof bag for up to 3 months. Thaw at room temperature for about 1–2 hours before frosting.
To freeze frosted cupcakes, flash-freeze on a tray until the frosting is firm (about 1 hour), then transfer to a container with parchment between layers and freeze up to 2 months. Thaw in the fridge overnight to avoid condensation on the frosting.
For reheating, bring refrigerated cupcakes to room temperature for 30–60 minutes; avoid microwaving frosted cupcakes directly, as the frosting will soften and lose structure.
Variations & Substitutions for Witch Hat Chocolate Cupcakes
1) Chocolate-Orange Witch Hat Chocolate Cupcakes — Add 1 teaspoon orange zest to the batter and use an orange-flavored chocolate for the Kiss. This intensifies citrus notes and pairs beautifully with the cocoa base.
-
Nutty Witch Hat Chocolate Cupcakes — Fold 1/3 cup finely chopped toasted hazelnuts into the batter for added crunch and a toasted flavor. Toasting nuts enhances aroma; discard skins if you want a cleaner texture.
-
Dark Chocolate Witch Hat Chocolate Cupcakes — Swap unsweetened cocoa for Dutch-processed cocoa and add a tablespoon of espresso powder to deepen the chocolate profile. This yields a richer, more sophisticated chocolate punch.
-
Dairy-Free Witch Hat Chocolate Cupcakes — Use a non-dairy milk and a neutral oil-based spread for frosting; choose dairy-free chocolate Kisses and sandwich cookies to keep the theme. Texture will be slightly different but still delightful and inclusive for dietary needs.
Frequently Asked Questions About Witch Hat Chocolate Cupcakes
Q1: Can I make the cupcakes ahead of time?
A1: Yes. Bake the cupcakes up to 3 days in advance and store unfrosted in an airtight container at room temperature. Frost within 24 hours for best texture. If frosted, keep refrigerated and serve at room temperature.
Q2: How do I prevent frosting from melting?
A2: Work in a cool kitchen, chill your frosting for 10–15 minutes if it gets too soft, and pipe on cupcakes that are completely cooled. Use more powdered sugar for a stiffer batch, or chill the finished tray briefly before transport.
Q3: Can I use regular Oreos instead of Oreo Thins?
A3: You can, but full Oreos are thicker and may overwhelm the frosting pipe and cause the Kiss to sit awkwardly. If using regular Oreos, press out the cream slightly or use a smaller cookie for balance.
Q4: My cupcakes sank in the middle — why?
A4: Sinking can result from underbaking, opening the oven too early, or overmixing which weakens structure. Ensure accurate oven temperature with an oven thermometer and bake until a toothpick shows a few moist crumbs.
Q5: How do I get bright green and orange frosting without thinning it?
A5: Use gel food coloring because it adds intense color with very little liquid. Add color sparingly, mixing thoroughly until you reach the desired shade; avoid liquid food coloring which can make frosting runny.
{image_template}
Final Thoughts on Witch Hat Chocolate Cupcakes
These Witch Hat Chocolate Cupcakes are an easy, show-stopping dessert that combines simple techniques with playful assembly for big visual impact.
If you loved the recipe, please leave a star rating in the recipe card below and pin this to Pinterest for later.
For more creative takes and inspiration, check out Tastes Better From Scratch’s Witch Hat Cupcakes, explore another fun version at Pies and Tacos Witch Hat Cupcakes, and see a third approach at Homemade Hooplah Witch Hat Cupcakes.
Witch Hat Chocolate Cupcakes
Ingredients
Method
- Preheat the oven to 350°F and line a muffin tin with 16 cupcake liners.
- In a large bowl, whisk together the flour, cocoa powder, baking powder, and salt.
- In a separate bowl, beat together the sugar, vegetable oil, and egg until glossy.
- Mix in the milk and vanilla until combined.
- Gradually add the dry ingredients to the wet ingredients, mixing until just incorporated.
- Fill the cupcake liners halfway and bake for 20–25 minutes.
- Whip the softened butter and vanilla until fluffy, then gradually add the powdered sugar.
- If needed, add heavy cream to adjust the consistency.
- Tint portions of frosting green and orange using gel food coloring.
- Pipe the green frosting onto each cooled cupcake in a hair pattern.
- Top each swirl with an Oreo Thin and pipe an orange ring, then press a Hershey's Kiss into the center.